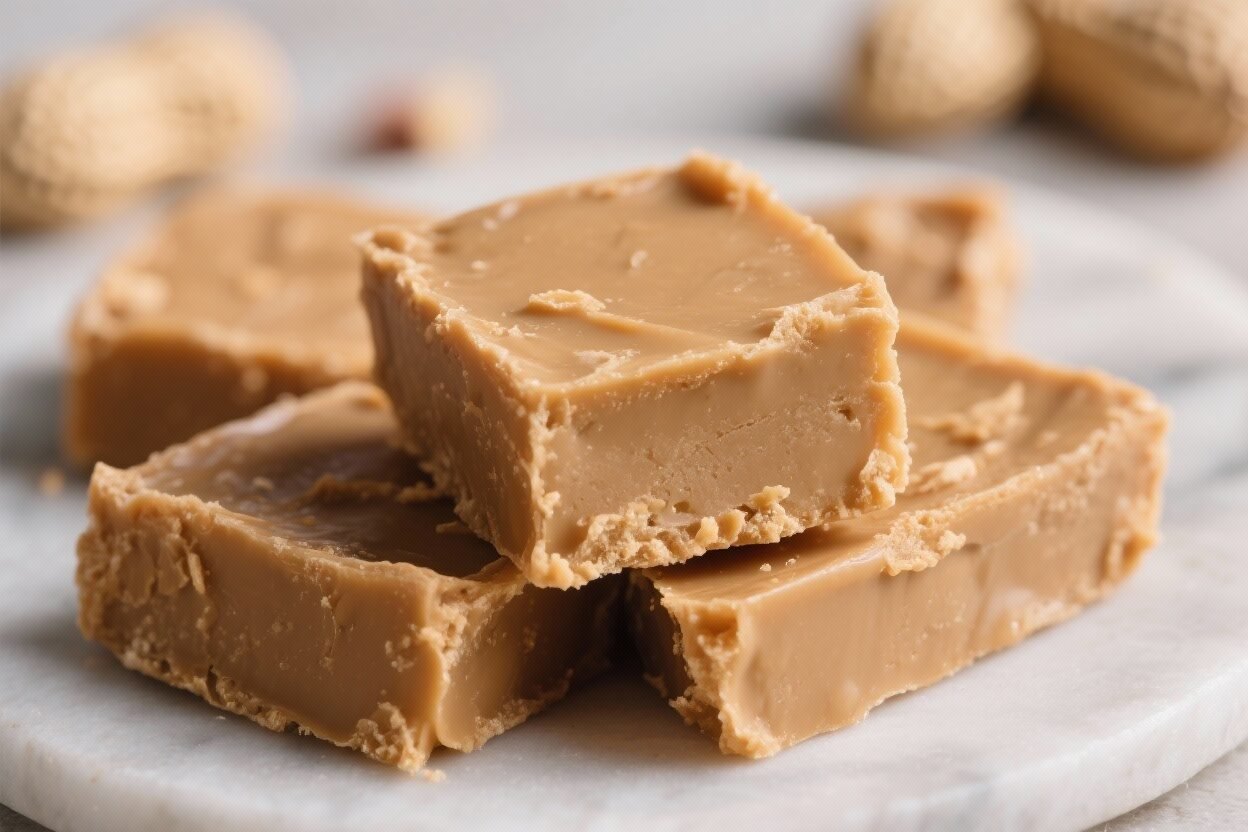
Classic Peanut Butter Fudge – Smooth, Sweet, and Comforting
Peanut butter fudge is the kind of treat that brings instant nostalgia. It’s creamy, sweet, and melts on your tongue in a way that makes you reach for just one more square. This version keeps things classic: no fancy twists, no hard-to-find ingredients, just pure peanut buttery goodness.
Whether you’re making it for a holiday tray or a midweek pick-me-up, it comes together quickly and delivers every time. If you love simple recipes that taste like childhood, this one’s for you.
Classic Peanut Butter Fudge – Smooth, Sweet, and Comforting
Ingredients
Method
- Prep your pan: Line an 8-inch or 9-inch square pan with parchment, leaving an overhang for easy lifting. Lightly butter the parchment if you want extra insurance against sticking.
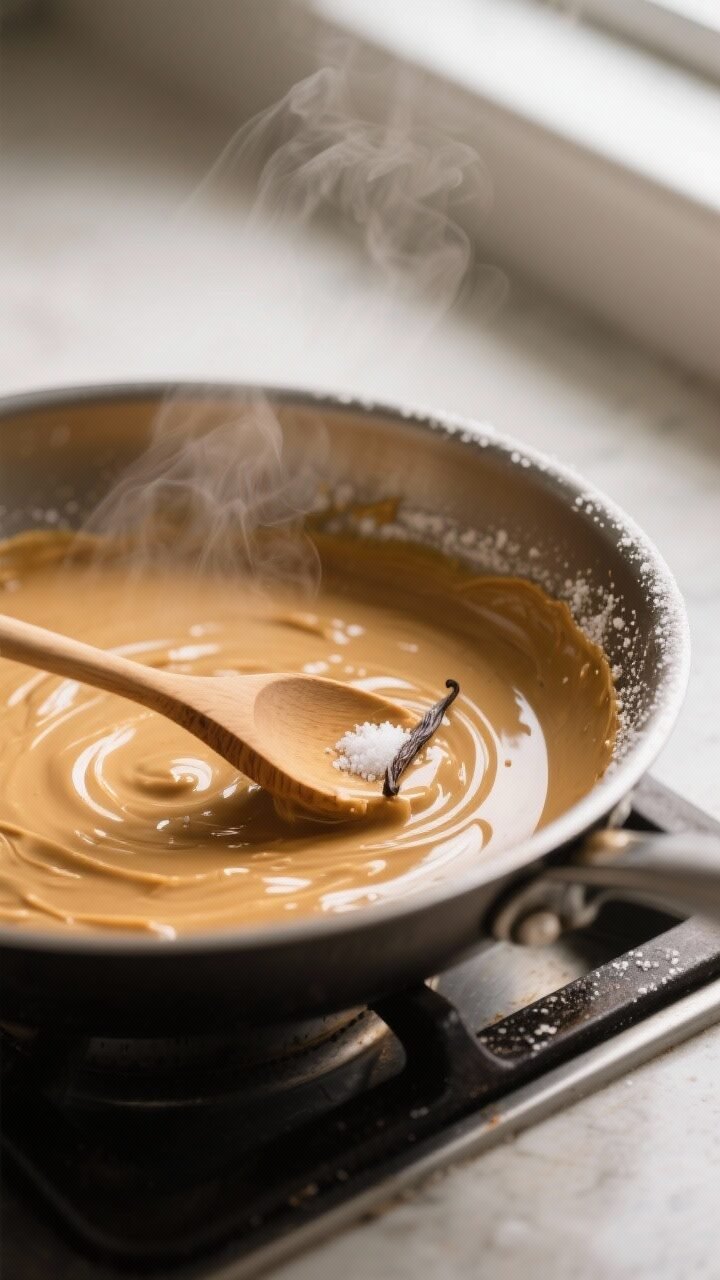
- Melt the base: In a medium saucepan over medium heat, melt the butter.Stir frequently so it doesn’t brown unless you like a toasted note.
- Add peanut butter: Stir in the peanut butter until completely smooth and combined with the butter. Keep the mixture warm but not boiling.
- Flavor it: Remove the pan from heat. Stir in the vanilla and salt.
- Sweeten and thicken: Add the powdered sugar 1 cup at a time, whisking or stirring well after each addition.The mixture will go from glossy to thick and matte. Start tasting and adjusting after 3 1/2 cups; add more sugar if you want a firmer set.
- Press into the pan: Scrape the fudge into your prepared pan. Use a spatula to smooth the top.If it’s sticky, lightly grease the spatula or press with a piece of parchment.
- Let it set: Allow the fudge to cool at room temperature for 1–2 hours, or refrigerate for about 45 minutes until firm enough to cut.
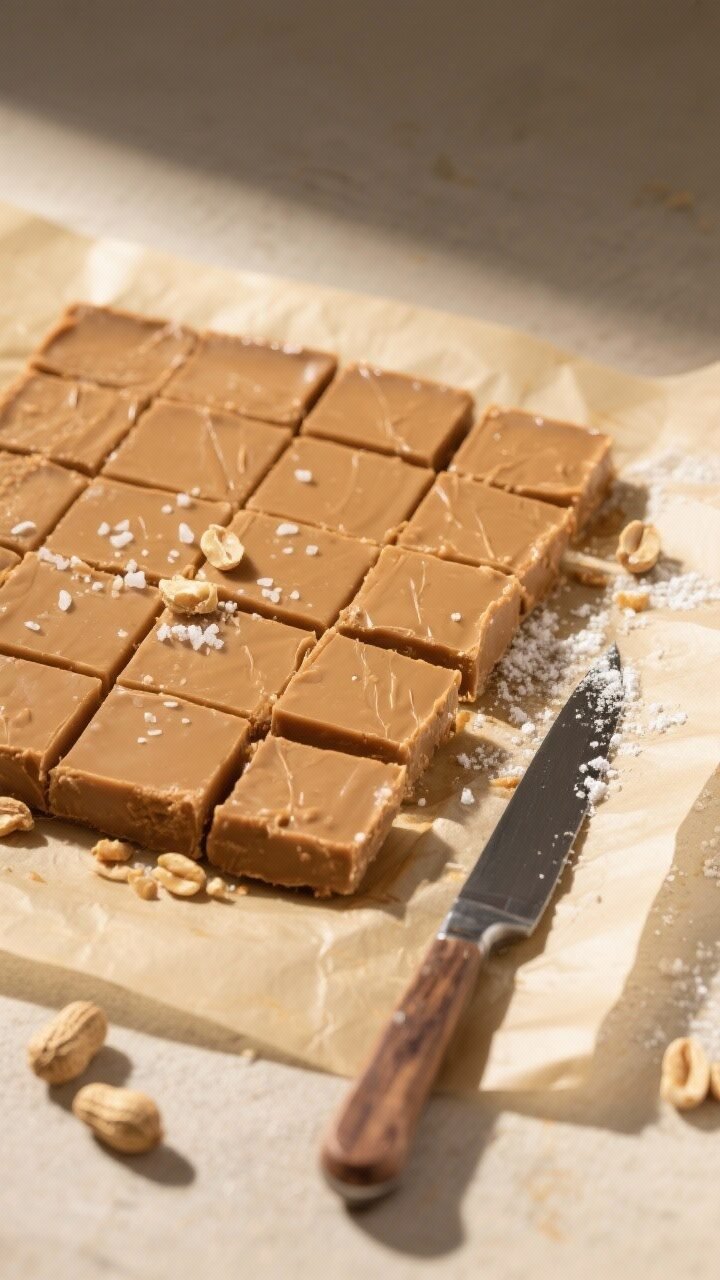
- Cut and serve: Lift the slab out by the parchment. Use a long, sharp knife to cut into small squares. Wipe the knife between cuts for clean edges.
What Makes This Recipe So Good
- Foolproof texture: Smooth, firm, and sliceable without being dry or crumbly.
- Quick to make: About 10 minutes on the stove, then it sets as it cools.
- Pantry-friendly: Uses ingredients you likely already have.
- Big peanut butter flavor: Sweet, salty, and deeply satisfying.
- Great for gifting: Holds up well, cuts cleanly, and looks beautiful in a tin.
What You’ll Need
- 1 cup (2 sticks) unsalted butter – Salted works too; just reduce added salt.
- 1 cup creamy peanut butter – Choose a no-stir variety for best texture.
- 1 teaspoon vanilla extract – Rounds out the flavor.
- 1/4 teaspoon fine salt – Skip if using salted butter or salty peanut butter.
- 3 1/2 to 4 cups powdered sugar – Sift if lumpy; adjust for preferred firmness.
- Parchment paper – For lining the pan.
You’ll also need an 8-inch or 9-inch square baking pan, a medium saucepan, a spatula, and a whisk or wooden spoon.
How to Make It
- Prep your pan: Line an 8-inch or 9-inch square pan with parchment, leaving an overhang for easy lifting. Lightly butter the parchment if you want extra insurance against sticking.
- Melt the base: In a medium saucepan over medium heat, melt the butter.Stir frequently so it doesn’t brown unless you like a toasted note.
- Add peanut butter: Stir in the peanut butter until completely smooth and combined with the butter. Keep the mixture warm but not boiling.
- Flavor it: Remove the pan from heat. Stir in the vanilla and salt.
- Sweeten and thicken: Add the powdered sugar 1 cup at a time, whisking or stirring well after each addition.The mixture will go from glossy to thick and matte. Start tasting and adjusting after 3 1/2 cups; add more sugar if you want a firmer set.
- Press into the pan: Scrape the fudge into your prepared pan. Use a spatula to smooth the top.If it’s sticky, lightly grease the spatula or press with a piece of parchment.
- Let it set: Allow the fudge to cool at room temperature for 1–2 hours, or refrigerate for about 45 minutes until firm enough to cut.
- Cut and serve: Lift the slab out by the parchment. Use a long, sharp knife to cut into small squares. Wipe the knife between cuts for clean edges.
Storage Instructions
- Room temperature: Store in an airtight container for up to 1 week.Keep layers separated with parchment to prevent sticking.
- Refrigerator: Keeps for up to 2 weeks. Let it sit at room temp for 10–15 minutes before serving to soften slightly.
- Freezer: Wrap tightly and freeze for up to 2 months. Thaw in the fridge overnight, then bring to room temperature before eating.
Tip: Avoid humidity when storing.
Moisture can soften the edges and make the top sticky.
Benefits of This Recipe
- Fast and easy: No candy thermometer, no fuss, and very little cleanup.
- Budget-friendly: Simple ingredients deliver a crowd-pleasing result.
- Flexible sweetness: You control the texture and sweetness by adjusting the powdered sugar.
- Consistent results: The method is reliable even for beginners.
- Make-ahead friendly: Great for planning holiday trays and parties in advance.
What Not to Do
- Don’t use natural peanut butter that separates. The oil can cause a greasy or crumbly fudge. Choose a no-stir creamy variety.
- Don’t skip sifting if your powdered sugar is lumpy. Lumps lead to grainy texture.
- Don’t overheat the mixture. Boiling can break the emulsion and lead to oily fudge.
- Don’t rush the set time. Cutting too early can smear the edges and make a mess.
- Don’t overload with add-ins. Too many mix-ins compromise structure; keep them modest.
Variations You Can Try
- Salted peanut crumble: Sprinkle flaky sea salt and crushed roasted peanuts on top before it sets.
- Chocolate swirl: Melt 1/2 cup chocolate chips and drizzle over the fudge. Swirl with a knife before it firms up.
- Maple twist: Swap half the vanilla for pure maple extract for a warm, cozy flavor.
- Crunchy version: Use crunchy peanut butter or fold in 1/2 cup chopped peanuts for texture.
- Peanut butter cup: Press mini peanut butter cups into the surface or layer them in the middle.
- Espresso kick: Dissolve 1 teaspoon instant espresso in the melted butter for a mocha-peanut vibe.
- Gluten-free assurance: This recipe is naturally gluten-free; just double-check your vanilla and add-ins.
FAQ
Can I use natural peanut butter?
You can try, but it’s risky.
Natural peanut butter that separates tends to make fudge oily or soft. If you must use it, stir it very well, weigh your powdered sugar, and be prepared to add a little extra to help it set.
How do I fix fudge that’s too soft?
Scrape it back into a saucepan and warm gently on low heat. Stir in more powdered sugar, 1/4 cup at a time, until the mixture thickens and turns matte.
Press back into the pan and let it set again.
Why is my fudge grainy?
Graininess usually comes from lumpy powdered sugar or overheating. Next time, sift the sugar and keep the heat moderate. If it’s only slightly grainy, chilling helps the texture feel smoother when you eat it.
Can I make this dairy-free?
Yes.
Use a high-quality dairy-free butter substitute that’s solid at room temperature (not a spread with lots of water). The texture will be slightly different but still delicious.
How many pieces does this make?
An 8-inch pan yields about 36 small squares or 25 larger ones. The richness means small pieces are perfect for serving.
Do I need a candy thermometer?
No.
This is a no-fuss fudge. The powdered sugar creates the structure, so you don’t need to cook to a specific temperature.
Can I reduce the sugar?
You can, but the fudge will be softer. Use at least 3 1/2 cups for a firm set.
If you prefer less sweetness, start there and chill well before slicing.
Wrapping Up
Classic Peanut Butter Fudge is pure comfort: rich, smooth, and unbelievably simple to make. With a handful of pantry staples and a few easy steps, you get a sweet treat that tastes like it came from a beloved family recipe box. Keep the basics in mind—no-stir peanut butter, gentle heat, and enough powdered sugar—and you’ll get perfect results every time.
Slice it small, share it generously, and enjoy that melt-in-your-mouth moment.