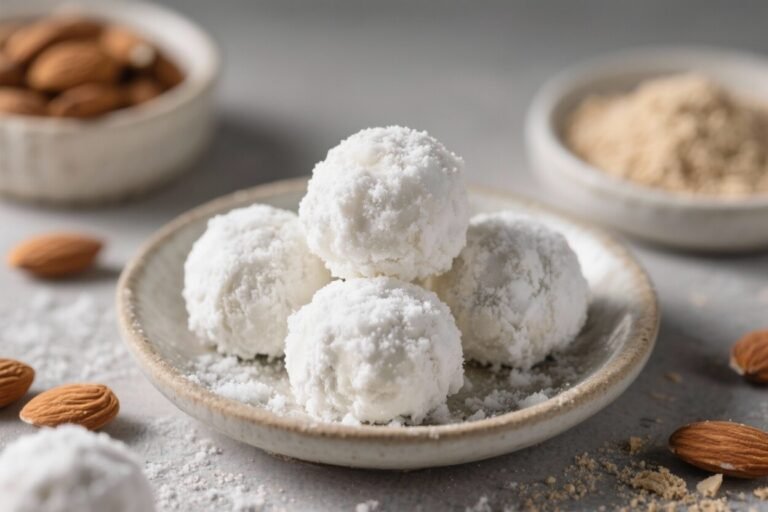
Cool Whip Peanut Butter Candy Bites – A Creamy, No-Bake Treat
These little bites are the kind of dessert you make once and immediately add to your regular rotation. They’re creamy, sweet, and peanut buttery, with a soft, truffle-like center that melts in your mouth. Best of all, they come together with just a handful of ingredients and no baking.
You mix, chill, roll, and dip—simple as that. If you love peanut butter cups but want something lighter and airier, these are your new favorite treat.
Cool Whip Peanut Butter Candy Bites - A Creamy, No-Bake Treat
Ingredients
Method
- Soften and prep: Thaw the Cool Whip in the fridge until soft and scoopable.Line a baking sheet with parchment and clear a spot in your freezer.
- Mix the base: In a medium bowl, stir together 1 cup creamy peanut butter, 1 1/2 cups Cool Whip, 1/2 cup powdered sugar, 1 teaspoon vanilla, and a pinch of salt. Start gently so the Cool Whip stays fluffy, then fold until smooth.
- Chill the mixture: Cover and refrigerate for 30–45 minutes, or until the mixture firms up enough to scoop. If it’s still too soft, give it another 15 minutes or a quick 10-minute stint in the freezer.
- Portion the bites: Use a small cookie scoop or spoon to portion 1–tablespoon mounds onto the lined baking sheet.You should get about 20–24 bites.
- Shape and freeze: Quickly roll each mound between your palms to form smooth balls. Work fast so they don’t warm up. Freeze the tray for 20–30 minutes until solid.
- Melt the chocolate: In a microwave-safe bowl, melt 1 1/2 cups chocolate chips with 1–2 teaspoons coconut oil in 20–30 second bursts, stirring between each until smooth.You can also use a double boiler. The chocolate should be silky and pourable.
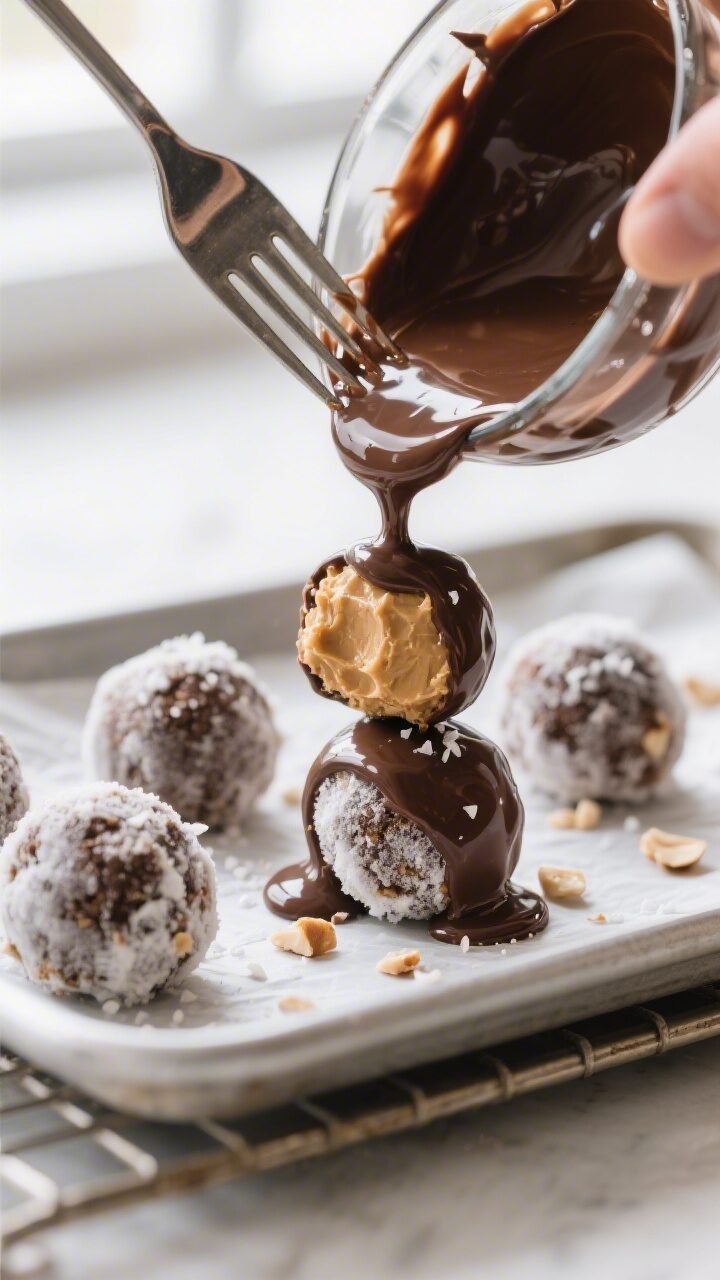
- Dip the bites: Using a fork, dip each frozen ball into the chocolate, letting excess drip through the tines. Set back on the parchment.If you’re adding toppings, sprinkle them on before the chocolate sets.
- Set and serve: Chill the tray for 10–15 minutes until the chocolate firms up. Enjoy straight from the fridge for the best texture.
Why This Recipe Works
Cool Whip gives the filling a light, fluffy texture you can’t get from peanut butter alone. It whips air into the mixture and keeps it soft even when chilled.
Peanut butter brings rich flavor and body, while powdered sugar adds sweetness and structure. A quick dip in chocolate seals it all with a satisfying snap. The result is a bite that’s creamy inside, crisp outside, and completely addictive.
What You’ll Need
- Creamy peanut butter (not natural-style, for best texture)
- Cool Whip (thawed in the fridge)
- Powdered sugar (also called confectioners’ sugar)
- Vanilla extract (optional, but lovely)
- Salt (a pinch to balance the sweetness)
- Chocolate for coating (semisweet, milk, or dark chocolate chips or melting wafers)
- Coconut oil or neutral oil (optional, to thin the chocolate)
- Toppings (optional: crushed peanuts, flaky sea salt, sprinkles, mini chocolate chips)
- Parchment paper and a baking sheet
- Small cookie scoop or spoon
How to Make It

- Soften and prep: Thaw the Cool Whip in the fridge until soft and scoopable.Line a baking sheet with parchment and clear a spot in your freezer.
- Mix the base: In a medium bowl, stir together 1 cup creamy peanut butter, 1 1/2 cups Cool Whip, 1/2 cup powdered sugar, 1 teaspoon vanilla, and a pinch of salt. Start gently so the Cool Whip stays fluffy, then fold until smooth.
- Chill the mixture: Cover and refrigerate for 30–45 minutes, or until the mixture firms up enough to scoop. If it’s still too soft, give it another 15 minutes or a quick 10-minute stint in the freezer.
- Portion the bites: Use a small cookie scoop or spoon to portion 1–tablespoon mounds onto the lined baking sheet.You should get about 20–24 bites.
- Shape and freeze: Quickly roll each mound between your palms to form smooth balls. Work fast so they don’t warm up. Freeze the tray for 20–30 minutes until solid.
- Melt the chocolate: In a microwave-safe bowl, melt 1 1/2 cups chocolate chips with 1–2 teaspoons coconut oil in 20–30 second bursts, stirring between each until smooth.You can also use a double boiler. The chocolate should be silky and pourable.
- Dip the bites: Using a fork, dip each frozen ball into the chocolate, letting excess drip through the tines. Set back on the parchment.If you’re adding toppings, sprinkle them on before the chocolate sets.
- Set and serve: Chill the tray for 10–15 minutes until the chocolate firms up. Enjoy straight from the fridge for the best texture.
How to Store
- Refrigerator: Store in an airtight container for up to 1 week. Keep layers separated with parchment so they don’t stick.
- Freezer: Freeze for up to 2 months.Let sit at room temperature for 5–10 minutes before enjoying for a softer center.
- Room temperature: Not ideal. The filling softens quickly and the chocolate can smudge. Keep them chilled until serving.
Why This is Good for You
These aren’t health food, but they do offer a few perks.
Peanut butter brings protein, healthy fats, and fiber, which make each bite more satisfying than a standard candy. Making these at home also means you control the ingredients and portion sizes. A small piece can curb a sweet tooth without a long list of additives.
Pitfalls to Watch Out For
- Using natural peanut butter: Natural varieties separate and can make the filling loose or oily.Choose a no-stir, creamy option.
- Skipping the chill: If you don’t chill before rolling and dipping, the bites will be messy and may fall apart in the chocolate.
- Overheating the chocolate: Burnt chocolate turns thick and grainy. Melt low and slow, stirring often.
- Too much powdered sugar: It can make the filling chalky. Measure lightly and taste as you go.
- Working in a warm kitchen: Heat softens the centers.Keep the tray in the freezer and take out a few at a time to dip.
Variations You Can Try
- Dark chocolate + sea salt: Use 70% dark chocolate and finish with a pinch of flaky salt for a grown-up twist.
- Crunch factor: Stir in crushed graham crackers, crispy rice cereal, or chopped peanuts to the filling.
- Cookie butter swap: Replace peanut butter with Biscoff spread for a spiced, caramelized flavor.
- Almond or cashew butter: Go nutty with a different butter. Choose creamy, no-stir styles for best structure.
- Swirled centers: Marble in a spoonful of Nutella or strawberry jam before chilling.
- White chocolate shell: Coat with white chocolate and drizzle with dark chocolate for contrast.
- Protein boost: Add 1–2 tablespoons vanilla protein powder and adjust with a splash of milk if too thick.
- Mini cups: Press the filling into mini muffin liners, freeze, and top with chocolate for a peanut butter cup vibe.
FAQ
Can I use whipped cream instead of Cool Whip?
You can, but stabilize it first. Lightly sweetened whipped cream without stabilizers can deflate and weep, making the filling too soft.
If you swap, fold in whipped cream gently and keep the bites well chilled.
What kind of peanut butter works best?
Use creamy, no-stir peanut butter for consistent texture. Natural peanut butter separates and can make the mixture oily or too loose to roll cleanly.
How do I fix a filling that’s too soft?
Chill it longer, then stir in a little more powdered sugar—1 tablespoon at a time—until it holds a scoopable shape. If needed, freeze for 10 minutes before rolling.
My chocolate coating is too thick.
What should I do?
Stir in 1 teaspoon of coconut oil or neutral oil at a time until the chocolate flows smoothly. Keep it warm, but not hot, while dipping.
Can I make these ahead for a party?
Yes. Make them up to 3 days in advance and store in the fridge.
For longer storage, freeze them and thaw briefly before serving. They hold their shape well and look great on a dessert tray.
Do they work without chocolate coating?
They do, but the shell adds structure. If you skip the dip, roll the chilled bites in cocoa powder, crushed peanuts, or finely shredded coconut to prevent sticking.
How big should each bite be?
About 1 tablespoon of filling per bite is ideal.
It gives a nice balance of creamy center to chocolate shell and makes portioning easy.
Can I make them dairy-free?
Yes. Use a dairy-free whipped topping and dairy-free chocolate. Check labels to be sure there’s no milk powder in the coating.
Why is my chocolate streaky or dull?
Moisture or overheating can cause bloom or streaks.
Pat the bites dry if there’s condensation, melt chocolate gently, and let it set in a cool room or the fridge—not the freezer.
What’s the best way to drizzle for a clean finish?
Use a small zip-top bag, snip a tiny corner, and pipe thin stripes of melted chocolate. Drizzle once the first coat sets for sharp lines.
In Conclusion
Cool Whip Peanut Butter Candy Bites hit that sweet spot between easy and impressive. They’re soft, creamy, and rich without being heavy, and they come together with simple pantry staples.
Keep a batch in the fridge for a quick treat, or dress them up with toppings for parties and holidays. Once you try them, you’ll find endless ways to make them your own—and plenty of reasons to make them again.