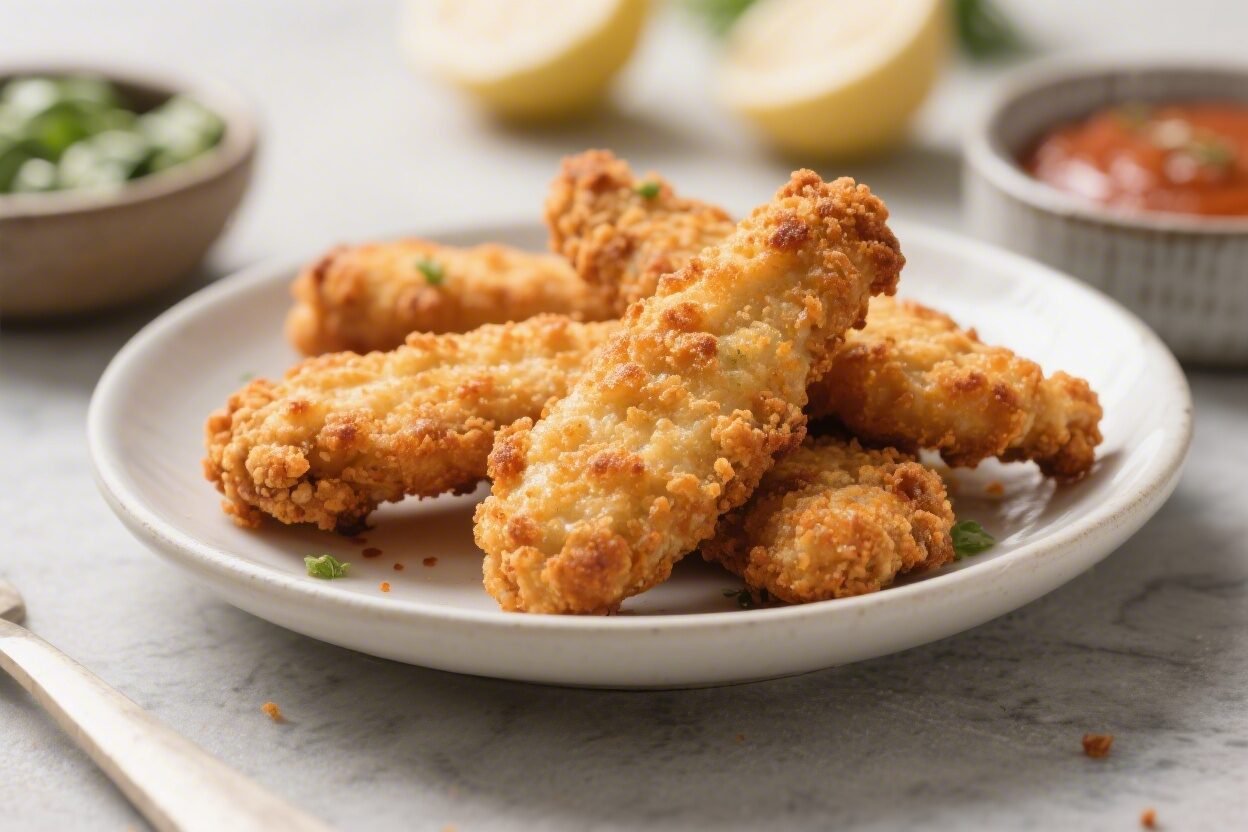
Crispy Baked Chicken Tenders – Golden, Juicy, and Easy
Baked chicken tenders should be simple: crunchy on the outside, juicy in the middle, and full of flavor. This version checks all the boxes without a deep fryer or complicated steps. You’ll get a shatter-crisp coating that actually sticks, plus tender, well-seasoned chicken every time.
They’re weeknight-friendly, kid-approved, and perfect for dipping. Make a big batch and watch them disappear.
Crispy Baked Chicken Tenders - Golden, Juicy, and Easy
Ingredients
Method
- Prep the oven and pan: Heat your oven to 425°F (220°C). Place a wire rack on a rimmed baking sheet and lightly spray it.If you don’t have a rack, line the pan with parchment and preheat it in the oven for 5 minutes to help crisp the bottoms.
- Pat the chicken dry: Use paper towels to remove excess moisture so the coating sticks and browns properly. Trim any tough tendon ends if using chicken tenders.
- Season the flour: In a shallow bowl, mix flour, 1 teaspoon salt, 1/2 teaspoon pepper, garlic powder, and paprika. Add onion powder or cayenne if using.
- Make the wet coat: In a second bowl, whisk eggs, mayo, and Dijon until smooth.This mixture helps crumbs cling and keeps the meat moist.
- Season the panko: In a third bowl, toss panko with 1/2 teaspoon salt and 2 tablespoons oil. Rubbing the oil into the panko gives a more even, golden crust.
- Dredge the chicken: Work one strip at a time. Coat in seasoned flour (shake off excess), dip into the egg-mayo mixture (let the extra drip off), then press into the panko until fully covered.
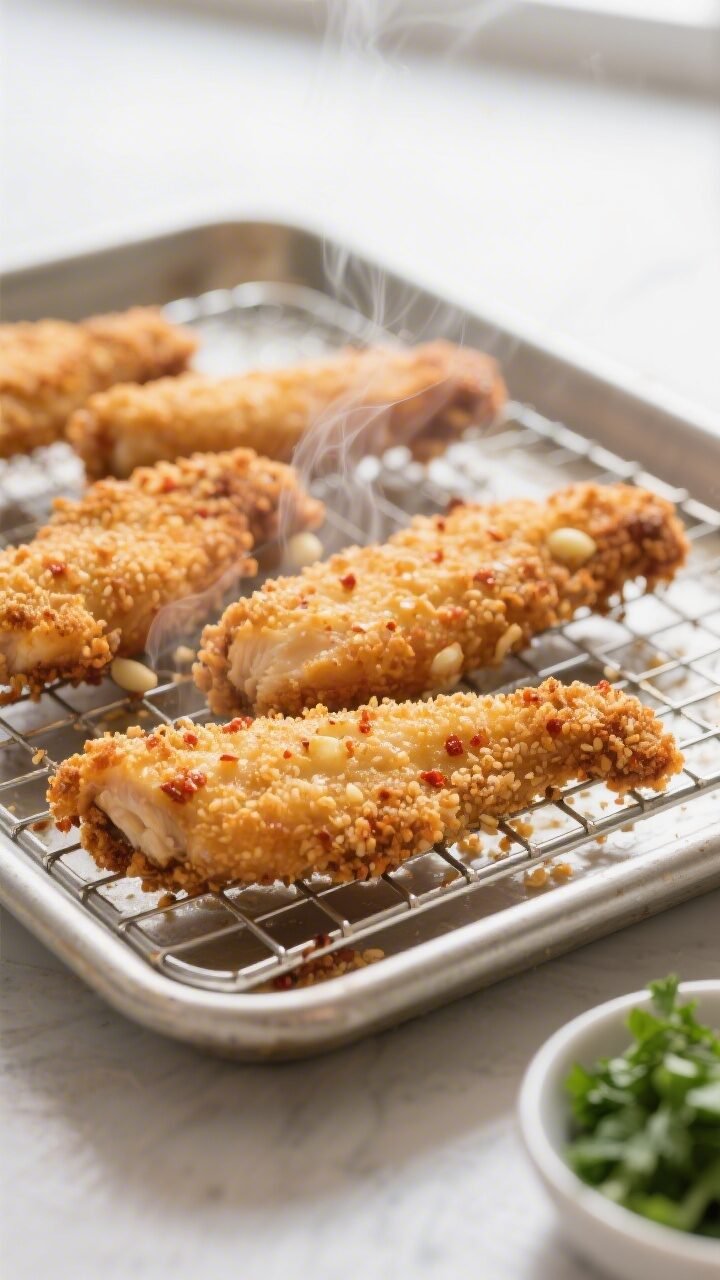
- Arrange on the rack: Place breaded tenders spaced out on the prepared rack or hot pan.Lightly spray or drizzle the tops with oil for extra crunch.
- Bake until crisp and cooked through: Bake 12–16 minutes, flipping once halfway. Cook until the coating is golden and the internal temperature hits 165°F (74°C). Thicker strips may need a couple more minutes.
- Optional broil: For added color, broil on high for 1 minute at the end.Watch closely to avoid burning.
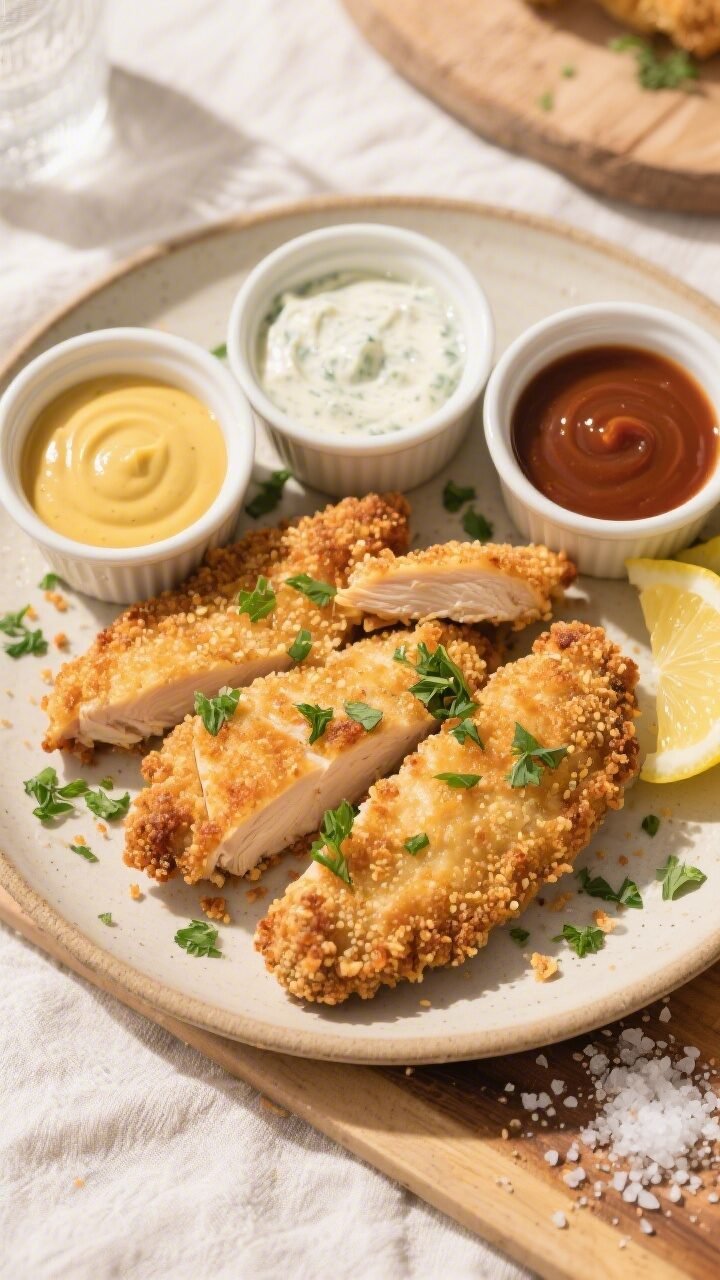
- Rest and serve: Let the tenders rest for 3 minutes to lock in juices. Sprinkle with herbs and serve with your favorite sauces.
Why This Recipe Works
- Double-layer breading for extra crunch: A seasoned flour base plus panko on the outside gives you that classic crispy bite.
- Baking at high heat: A hot oven and preheated sheet pan help the coating crisp without drying out the chicken.
- Mustard and mayo magic: A thin coating of Dijon and mayo helps the crumbs adhere and adds flavor without tasting “saucy.”
- Balanced seasoning: Garlic, paprika, and a touch of salt bring out the chicken’s flavor, so it tastes great even without sauce.
- Oil where it counts: A light drizzle—or spray—over the coating promotes browning and crunch without greasiness.
Shopping List
- Chicken: 1.5 to 2 pounds chicken tenders (or boneless, skinless chicken breasts cut into strips)
- Flour: 1/2 cup all-purpose flour
- Panko breadcrumbs: 1.5 cups (Japanese-style for extra crunch)
- Eggs: 2 large
- Mayonnaise: 2 tablespoons
- Dijon mustard: 1 tablespoon
- Seasonings: 1.5 teaspoons kosher salt, 1 teaspoon garlic powder, 1 teaspoon smoked or sweet paprika, 1/2 teaspoon black pepper
- Optional flavor boosts: 1/2 teaspoon onion powder, pinch of cayenne or chili powder
- Oil: 2 tablespoons neutral oil (or olive oil), plus nonstick spray if you have it
- Fresh herbs (optional): Chopped parsley or chives for garnish
- Dipping sauces: Honey mustard, ranch, barbecue, or buffalo sauce
Step-by-Step Instructions
- Prep the oven and pan: Heat your oven to 425°F (220°C). Place a wire rack on a rimmed baking sheet and lightly spray it.If you don’t have a rack, line the pan with parchment and preheat it in the oven for 5 minutes to help crisp the bottoms.
- Pat the chicken dry: Use paper towels to remove excess moisture so the coating sticks and browns properly. Trim any tough tendon ends if using chicken tenders.
- Season the flour: In a shallow bowl, mix flour, 1 teaspoon salt, 1/2 teaspoon pepper, garlic powder, and paprika. Add onion powder or cayenne if using.
- Make the wet coat: In a second bowl, whisk eggs, mayo, and Dijon until smooth.This mixture helps crumbs cling and keeps the meat moist.
- Season the panko: In a third bowl, toss panko with 1/2 teaspoon salt and 2 tablespoons oil. Rubbing the oil into the panko gives a more even, golden crust.
- Dredge the chicken: Work one strip at a time. Coat in seasoned flour (shake off excess), dip into the egg-mayo mixture (let the extra drip off), then press into the panko until fully covered.
- Arrange on the rack: Place breaded tenders spaced out on the prepared rack or hot pan.Lightly spray or drizzle the tops with oil for extra crunch.
- Bake until crisp and cooked through: Bake 12–16 minutes, flipping once halfway. Cook until the coating is golden and the internal temperature hits 165°F (74°C). Thicker strips may need a couple more minutes.
- Optional broil: For added color, broil on high for 1 minute at the end.Watch closely to avoid burning.
- Rest and serve: Let the tenders rest for 3 minutes to lock in juices. Sprinkle with herbs and serve with your favorite sauces.
How to Store
- Fridge: Cool completely, then store in an airtight container for up to 4 days. Keep a paper towel in the container to absorb moisture.
- Reheat: For best texture, use a 400°F (205°C) oven or air fryer for 6–8 minutes.Avoid the microwave if you want to keep the crust crispy.
- Freeze: Arrange cooked tenders on a sheet pan and freeze until solid. Transfer to a freezer bag for up to 2 months. Reheat from frozen at 400°F (205°C) for 12–15 minutes.
Health Benefits
- Lower in fat than fried: Baking uses far less oil while still delivering crunch, which helps keep overall calories and saturated fat in check.
- High-quality protein: Chicken breast or tenderloins offer lean protein to support muscle repair and energy.
- Customizable sodium: Season to taste and skip heavy store-bought breadings that often pack in extra salt.
- Better control over ingredients: Choose whole-grain panko or gluten-free crumbs, and pair with lighter dips like yogurt ranch.
What Not to Do
- Don’t skip drying the chicken: Wet chicken leads to soggy coating and poor browning.
- Don’t pack the pan: Overcrowding traps steam and softens the crust.Use two pans if needed.
- Don’t skimp on seasoning: Under-seasoned tenders taste flat. Season each layer lightly.
- Don’t forget oil on the crumbs: A small amount helps the panko turn golden and crisp in the oven.
- Don’t overbake: Dry chicken loses its appeal fast. Pull at 165°F (74°C) and rest briefly.
Recipe Variations
- Parmesan Crusted: Mix 1/2 cup finely grated Parmesan into the panko and add extra black pepper.
- Buffalo-Style: Toss cooked tenders with warmed buffalo sauce.Serve with celery and blue cheese dip.
- Coconut Panko: Swap 1/2 cup panko for unsweetened shredded coconut. Great with sweet chili sauce or mango salsa.
- Everything Bagel: Add 2 tablespoons everything bagel seasoning to the panko. Serve with a lemon-dill yogurt dip.
- Gluten-Free: Use gluten-free flour and GF panko or crushed rice crackers.Check labels on mustard and mayo.
- Spicy Cajun: Stir 2 teaspoons Cajun seasoning into the flour mix and a pinch into the panko.
- Herb and Lemon: Add lemon zest and dried Italian herbs to the panko. Finish with a squeeze of fresh lemon.
FAQ
Can I use chicken thighs instead of breasts or tenders?
Yes. Use boneless, skinless thighs cut into strips.
They’re juicier and forgiving, but may need an extra minute or two to reach 165°F (74°C).
What can I use instead of eggs?
A mix of 1/3 cup buttermilk or plain yogurt thinned with a splash of water works well. It helps the crumbs adhere and adds tang.
How do I make them extra crispy without a wire rack?
Preheat the sheet pan, line it with parchment, and flip the tenders halfway through. A light spray of oil on both sides also helps.
Can I prepare them ahead?
Yes.
Bread the tenders, place on a rack, and refrigerate uncovered for up to 6 hours. Bake right before serving. The chill actually helps the coating set.
What sauces pair best?
Honey mustard, ranch, barbecue, buffalo, chipotle mayo, or a simple lemon-garlic yogurt sauce all work.
Keep two or three on the table for variety.
Why is my coating falling off?
Usually it’s excess moisture or too much wet batter. Pat the chicken dry, shake off extra flour and egg, and press the panko on firmly.
Do I need to flip the tenders?
Flipping helps even browning, especially without a rack. If you’re using a rack and have good airflow, flipping is optional but still useful.
Can I air fry these?
Absolutely.
Air fry at 390°F (200°C) for 10–12 minutes, flipping once, until golden and 165°F (74°C) inside. Don’t overcrowd the basket.
Final Thoughts
Crispy baked chicken tenders are the kind of meal you can count on—quick to make, easy to customize, and reliably delicious. With a few smart tricks, you get a golden crust and juicy center without frying.
Keep this method in your back pocket, change up the seasonings, and match the sauces to your mood. Dinner just got simpler, lighter, and way more satisfying.