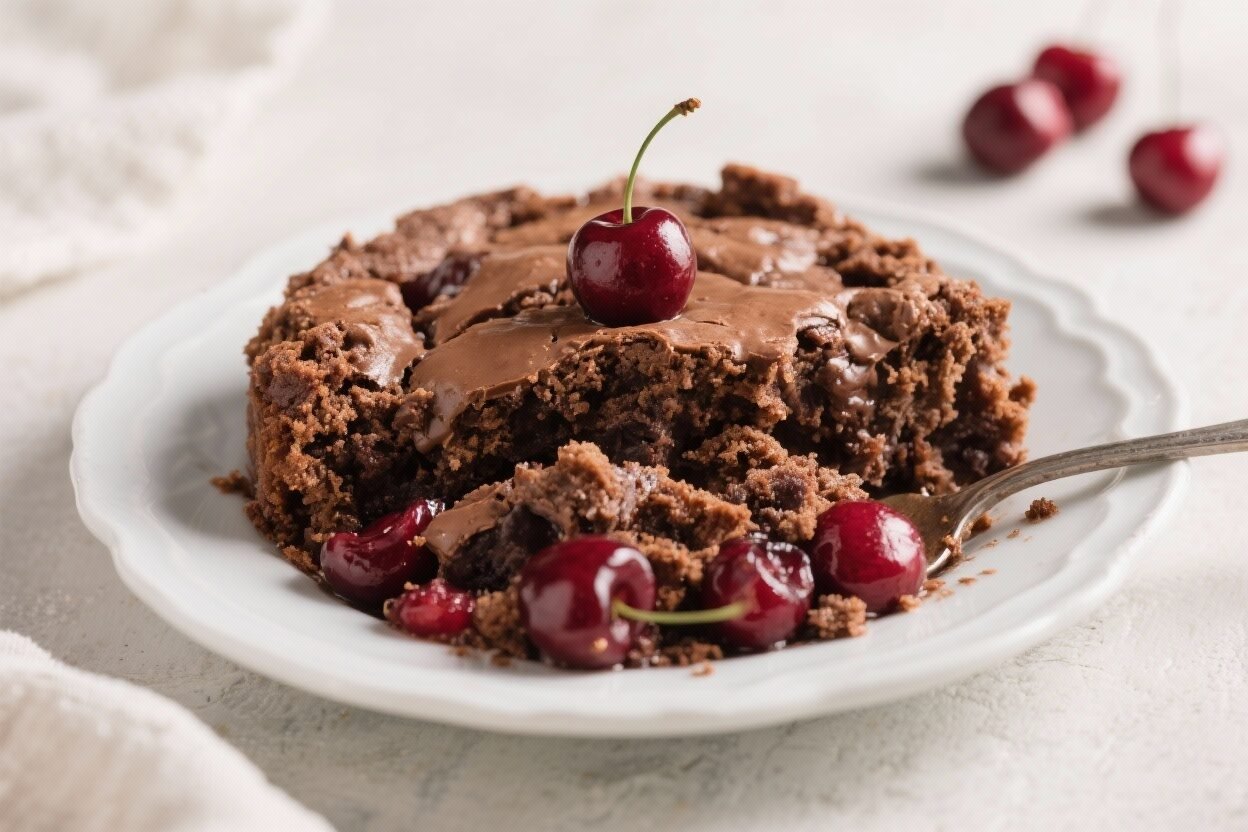
Easy Chocolate Cherry Dump Cake – A No-Fuss Dessert That Always Delivers
If you’re craving a rich, chocolatey dessert that takes almost no effort, this Easy Chocolate Cherry Dump Cake is the answer.
It’s the kind of recipe you can throw together on a busy weeknight or when guests are on the way. Everything comes together in one pan, and the oven does the rest.
Warm, gooey cherries meet a tender chocolate cake topping, and the whole thing feels comforting without being fussy. Serve it with a scoop of vanilla ice cream, and you’ve got dessert perfection with minimal cleanup.
Easy Chocolate Cherry Dump Cake - A No-Fuss Dessert That Always Delivers
Ingredients
Method
- Preheat your oven to 350°F (175°C).Lightly grease a 9x13-inch baking dish with butter or nonstick spray.
- Spread the cherry pie filling evenly across the bottom of the baking dish. If using, stir the vanilla and almond extracts into the cherries right in the dish.
- Sprinkle the dry chocolate cake mix evenly over the cherry layer. Don’t stir.Aim for an even layer to help the butter soak in evenly.
- Pour the melted butter over the cake mix. Try to cover as much surface area as possible. It won’t coat everything completely, and that’s fine.
- Scatter chocolate chips and nuts on top, if using.Add a tiny pinch of salt over the surface to cut sweetness.
- Bake for 35–45 minutes, until the top looks set and slightly crisp and the cherries are bubbling around the edges. Thicker layers may need an extra 5 minutes.
- Let it rest for 10–15 minutes. This helps the layers settle and makes serving easier.
- Serve warm with a scoop of vanilla ice cream or a dollop of whipped cream.
What Makes This Recipe So Good

- Five-minute prep: You literally dump, spread, and bake. No mixing bowls required.
- Big flavor, minimal effort: The combination of cherry pie filling and chocolate cake mix tastes like something you worked on for hours.
- Foolproof texture: The butter melts into the cake mix, creating a crispy, brownie-like top with a gooey cherry layer underneath.
- Budget-friendly: Uses pantry staples you can grab at any grocery store.
- Customizable: Add nuts, chocolate chips, or a splash of almond extract to make it your own.
Ingredients
- 2 cans (21 ounces each) cherry pie filling
- 1 box chocolate cake mix (15.25 ounces), any brand
- 1/2 cup unsalted butter, melted (8 tablespoons)
- 1 teaspoon vanilla extract (optional)
- 1/2 teaspoon almond extract (optional, but excellent with cherry)
- 1/2 cup semisweet chocolate chips (optional)
- 1/3 cup chopped pecans or walnuts (optional)
- Pinch of salt (optional, helps balance sweetness)
- Vanilla ice cream or whipped cream, for serving (optional but recommended)
Instructions

- Preheat your oven to 350°F (175°C).Lightly grease a 9×13-inch baking dish with butter or nonstick spray.
- Spread the cherry pie filling evenly across the bottom of the baking dish. If using, stir the vanilla and almond extracts into the cherries right in the dish.
- Sprinkle the dry chocolate cake mix evenly over the cherry layer. Don’t stir.Aim for an even layer to help the butter soak in evenly.
- Pour the melted butter over the cake mix. Try to cover as much surface area as possible. It won’t coat everything completely, and that’s fine.
- Scatter chocolate chips and nuts on top, if using.Add a tiny pinch of salt over the surface to cut sweetness.
- Bake for 35–45 minutes, until the top looks set and slightly crisp and the cherries are bubbling around the edges. Thicker layers may need an extra 5 minutes.
- Let it rest for 10–15 minutes. This helps the layers settle and makes serving easier.
- Serve warm with a scoop of vanilla ice cream or a dollop of whipped cream.
Keeping It Fresh
Leftovers keep well covered in the fridge for up to 4 days.
The top will soften, but the flavor stays great. Reheat individual portions in the microwave for 20–30 seconds to bring back that warm, gooey texture.
For longer storage, wrap tightly and freeze up to 2 months. Thaw in the fridge overnight, then warm in a 300°F oven for 10–15 minutes. Pro tip: Re-crisp the top by popping the dish under the broiler for 1–2 minutes.
Watch closely to avoid burning.
Why This is Good for You
While this is definitely a dessert, it still offers a few small wins. Cherries contain antioxidants and can support post-meal satisfaction thanks to their fiber content. A warm, homemade treat can also be part of a balanced lifestyle when enjoyed mindfully.
If you’d like to lighten it up a bit, you can tweak a few elements. Simple swaps: use a no-sugar-added cherry pie filling, reduce chocolate chips, or serve smaller portions with fresh berries on the side.
Flavor stays bold, but the overall sugar load drops.
Pitfalls to Watch Out For
- Dry patches on top: This happens if the butter doesn’t reach all areas. Drizzle a little extra melted butter or a few spoonfuls of cherry filling over any dry corners before baking.
- Soggy bottom: Underbaking can leave the cherry layer too loose. Bake until you see steady bubbling at the edges and the top looks set.
- Overly sweet result: Cherry pie filling and cake mix are sweet.Add a pinch of salt, use dark chocolate chips, or top with tangy whipped cream to balance it.
- Sticking to the pan: Grease the dish well. A light spray along the corners helps with easy serving.
- Uneven bake in glass dishes: If using glass, reduce the oven temperature to 325°F and add a few minutes. Glass retains heat differently than metal.
Variations You Can Try
- Black Forest Style: Add 1 tablespoon of kirsch or cherry liqueur to the filling.Finish with shaved chocolate and whipped cream.
- Double Chocolate: Use a devil’s food cake mix and add an extra 1/2 cup chocolate chips.
- Nutty Crunch: Mix chopped toasted almonds or pecans with 2 tablespoons of brown sugar and sprinkle on top before baking.
- Mocha Twist: Stir 1 teaspoon instant espresso powder into the melted butter for a deeper chocolate flavor.
- Gluten-Free: Swap in a gluten-free chocolate cake mix. Everything else remains the same.
- Dairy-Free: Use dairy-free margarine or coconut oil instead of butter and serve with non-dairy ice cream.
- Cherry-Berry Blend: Replace one can of cherry filling with mixed berry pie filling for a brighter fruit flavor.
- Mini Desserts: Bake in individual ramekins for 18–25 minutes. Perfect for portion control and presentation.
FAQ
Can I make this ahead?
Yes.
Assemble the layers up to 8 hours in advance and refrigerate. Bake right before serving. If the butter firms up in the fridge, it will melt and bake normally once in the oven.
Do I have to melt the butter?
Melting works best for even coverage.
If you’re out of time, thinly slice cold butter and arrange slices over the cake mix. Make sure to cover as much of the surface as possible.
Can I use fresh or frozen cherries?
You can, but you’ll need to sweeten and thicken them. Toss 4 cups of pitted cherries with 1/2 cup sugar and 2 tablespoons cornstarch, plus a splash of lemon juice.
Simmer until glossy and thick, then proceed as directed.
What size pan should I use?
A 9×13-inch pan is standard. For a thicker dessert, use a 9×9-inch pan and add 5–10 minutes to the bake time. Individual ramekins also work with adjusted timing.
How do I know when it’s done?
Look for bubbling fruit around the edges and a set, slightly crisp top.
A few moist spots are fine—this isn’t a traditional cake. If it looks powdery in places, bake a few minutes longer.
Is it supposed to be stirred?
No. The “dump” method relies on layering.
Stirring will turn it into a batter and change the texture, making it more uniform and less cobbler-like.
Can I use a different cake mix flavor?
Absolutely. Yellow or vanilla cake mixes pair nicely with cherry for a brighter flavor. Spice cake works too, giving a warm, cozy twist.
What’s the best way to serve it?
Serve warm, scooped into bowls. Best pairing: vanilla ice cream or lightly sweetened whipped cream.
A few chocolate shavings or toasted nuts add a nice finish.
Final Thoughts
This Easy Chocolate Cherry Dump Cake is proof that great desserts don’t have to be complicated. With a handful of pantry staples and a single pan, you get a rich, crowd-pleasing treat that feels special any night of the week. Keep the base recipe in your back pocket and play with the variations when you want to switch things up.
Simple, cozy, and reliably delicious—that’s the kind of dessert worth making again and again.