Gluten-Free Pizza Dough – Simple, Chewy, and Reliable
Skip the soggy crust and bland flavor—this gluten-free pizza dough bakes up tender inside with a crisp edge you can actually pick up. It’s designed for weeknights but good enough for company. The ingredients are easy to find, the steps are straightforward, and you don’t need special equipment.
Most of all, it behaves like real dough, so you can shape, top, and bake without stress. If you miss classic pizza, this gets you very close—gluten-free and proud of it.
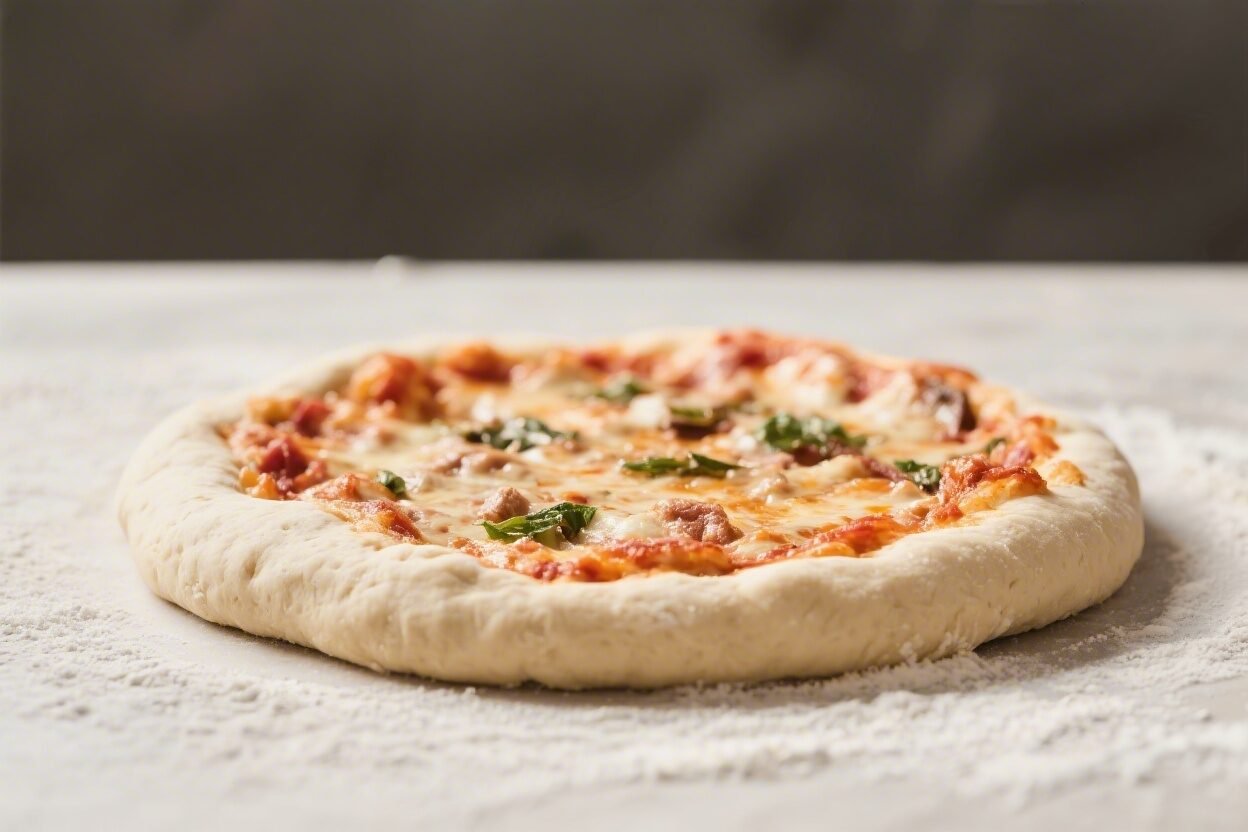
Gluten-Free Pizza Dough - Simple, Chewy, and Reliable
Method
- Preheat the oven and pan: Place a pizza stone or an upside-down sheet pan on the middle rack. Preheat to 475°F (245°C) for 30 minutes. A hot surface kickstarts crisping.
- Whisk the dry mix: In a large bowl, whisk the gluten-free flour blend, almond flour, tapioca starch, psyllium husk powder, instant yeast, sugar, and salt until evenly combined.
- Add liquids: Make a well and pour in 3/4 cup warm water, olive oil, and apple cider vinegar.Stir with a sturdy spoon until a shaggy dough forms. If it’s dry or crumbly, add water 1 tablespoon at a time until soft and slightly tacky.
- Mix to smooth: Beat the dough with the spoon or a mixer fitted with the paddle for 1–2 minutes. It should look smooth, cohesive, and a bit sticky—more like soft clay than bread dough.
- Quick rest: Cover the bowl and let the dough rest 20–30 minutes at room temperature.This hydrates the flours and lets the yeast wake up.
- Prepare your shaping surface: Cut a sheet of parchment paper to fit your pan. Lightly oil the parchment and your hands. This prevents sticking and helps with spreading.
- Shape the crust: Turn the dough onto the parchment.With oiled fingers, press it into a round 10–12 inches wide, about 1/4 inch thick in the center with a slightly thicker edge. Smooth cracks with damp fingers.
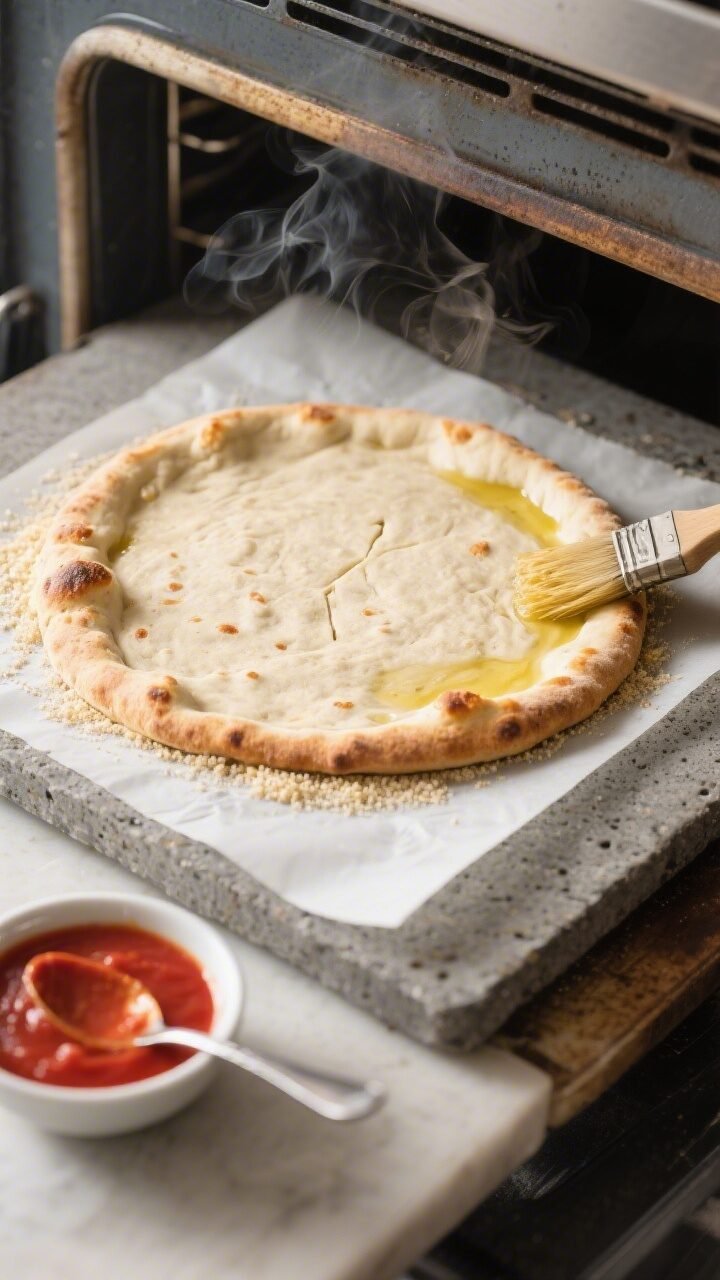
- Dock and oil: Prick the center of the dough lightly with a fork to prevent bubbles. Brush or drizzle a teaspoon of olive oil over the surface for a crisp finish.
- Par-bake: Slide the parchment and dough onto the preheated stone or pan.Bake for 8–10 minutes, until the top looks set and the edges just start to color. Remove carefully.
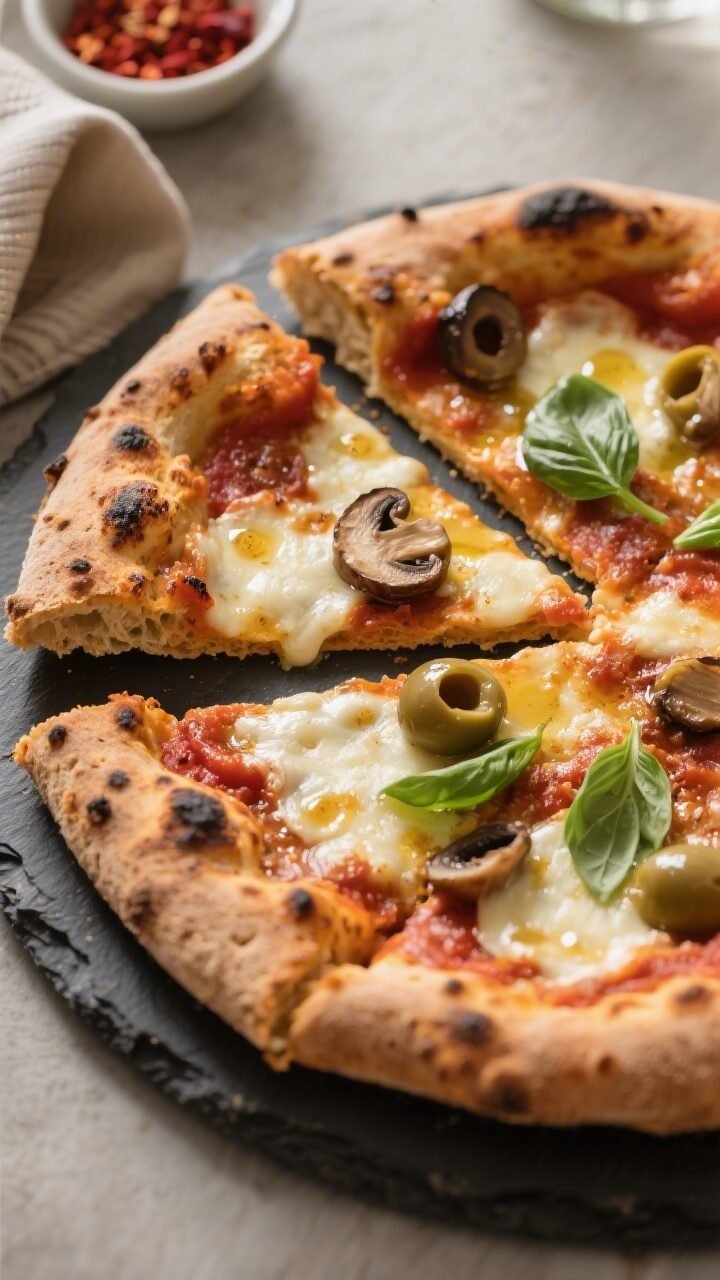
- Top it: Add a thin layer of sauce, cheese, and toppings. Don’t overload—too much moisture softens the crust.
- Final bake: Return to the oven and bake 8–12 minutes, until the cheese is melted and bubbly and the crust edges are golden with a few dark spots.
- Cool briefly and slice: Let the pizza rest 3–5 minutes on a rack to vent steam.Slide off the parchment, slice, and serve.
What Makes This Special
This recipe leans on a smart blend of flours and a bit of help from psyllium husk to build chew and structure. You’ll get a dough that’s easy to spread, not a batter that runs all over the pan.
A short rise adds airiness without a long wait. Pre-baking locks in texture so the center stays tender, not gummy. Finish with a high-heat bake for that golden, blistered edge pizza night deserves.
Shopping List
- Gluten-free flour blend (2 cups/260 g) – Choose a 1:1 baking blend that contains rice flour and starches.Avoid blends already salted.
- Finely ground almond flour (1/2 cup/50 g) – Adds tenderness and browning. Substitute with more GF blend if nut-free.
- Tapioca starch (1/4 cup/30 g) – For chew and stretch. Arrowroot works in a pinch.
- Psyllium husk powder (1 tablespoon) – Key for elasticity and moisture retention.Use powder, not whole husk.
- Instant yeast (2 teaspoons) – Or active dry yeast (proof if using active).
- Sugar or honey (2 teaspoons) – Feeds the yeast and helps browning.
- Kosher salt (1 teaspoon) – For flavor.
- Warm water (3/4 to 1 cup/180–240 ml at 105–115°F) – Start low and add as needed.
- Olive oil (2 tablespoons) – For moisture and crisp edges.
- Apple cider vinegar (1 teaspoon) – Brightens flavor and helps tenderness.
- Cornmeal or extra flour – For dusting.
- Your favorite sauce, cheese, and toppings
Step-by-Step Instructions
- Preheat the oven and pan: Place a pizza stone or an upside-down sheet pan on the middle rack. Preheat to 475°F (245°C) for 30 minutes. A hot surface kickstarts crisping.
- Whisk the dry mix: In a large bowl, whisk the gluten-free flour blend, almond flour, tapioca starch, psyllium husk powder, instant yeast, sugar, and salt until evenly combined.
- Add liquids: Make a well and pour in 3/4 cup warm water, olive oil, and apple cider vinegar.Stir with a sturdy spoon until a shaggy dough forms. If it’s dry or crumbly, add water 1 tablespoon at a time until soft and slightly tacky.
- Mix to smooth: Beat the dough with the spoon or a mixer fitted with the paddle for 1–2 minutes. It should look smooth, cohesive, and a bit sticky—more like soft clay than bread dough.
- Quick rest: Cover the bowl and let the dough rest 20–30 minutes at room temperature.This hydrates the flours and lets the yeast wake up.
- Prepare your shaping surface: Cut a sheet of parchment paper to fit your pan. Lightly oil the parchment and your hands. This prevents sticking and helps with spreading.
- Shape the crust: Turn the dough onto the parchment.With oiled fingers, press it into a round 10–12 inches wide, about 1/4 inch thick in the center with a slightly thicker edge. Smooth cracks with damp fingers.
- Dock and oil: Prick the center of the dough lightly with a fork to prevent bubbles. Brush or drizzle a teaspoon of olive oil over the surface for a crisp finish.
- Par-bake: Slide the parchment and dough onto the preheated stone or pan.Bake for 8–10 minutes, until the top looks set and the edges just start to color. Remove carefully.
- Top it: Add a thin layer of sauce, cheese, and toppings. Don’t overload—too much moisture softens the crust.
- Final bake: Return to the oven and bake 8–12 minutes, until the cheese is melted and bubbly and the crust edges are golden with a few dark spots.
- Cool briefly and slice: Let the pizza rest 3–5 minutes on a rack to vent steam.Slide off the parchment, slice, and serve.
How to Store
- Fridge: Wrap leftover slices and refrigerate up to 3 days. Reheat on a hot skillet or in a 425°F oven for 6–8 minutes to revive the crust.
- Freezer (baked): Freeze slices on a tray, then bag for up to 2 months. Reheat from frozen at 425°F for 10–12 minutes.
- Freezer (par-baked crust): After the par-bake step, cool completely.Wrap well and freeze up to 2 months. Top and bake straight from frozen, adding 2–3 extra minutes.
- Dough storage: Gluten-free dough is best used the same day. If needed, cover and refrigerate up to 24 hours.Let sit 20 minutes at room temp before shaping.
Benefits of This Recipe
- Reliable texture: Psyllium and tapioca team up for chew and structure so your slice holds its shape.
- Fast timeline: A short rest replaces long rises. Pizza is on the table in about an hour.
- Flexible ingredients: Works with common 1:1 blends and simple pantry items.
- Par-bake method: Prevents gumminess and guarantees a crisp bite.
- Custom-friendly: Easy to make dairy-free, egg-free, or nut-free with small swaps.
Common Mistakes to Avoid
- Skipping psyllium: Without it, the dough lacks elasticity and crumbles. Use powder for best results.
- Too much water: Aim for soft and tacky, not pourable.Add water gradually until the dough just holds together.
- Overloading toppings: Heavy sauce or wet vegetables can make the center soggy. Keep toppings light and blot watery veggies.
- Not preheating the pan: A cold pan leads to pale, soft crust. Preheat for at least 30 minutes.
- Skipping the par-bake: This step sets the structure.Don’t top raw dough.
Recipe Variations
- Herbed crust: Add 1 teaspoon Italian seasoning and 1/2 teaspoon garlic powder to the dry mix.
- Thin and crispy: Press the dough to 13–14 inches and bake a minute or two longer in each stage.
- Deep-dish style: Press into a lightly oiled cast-iron skillet. Par-bake 10–12 minutes, then top and bake until deeply golden.
- Whole-grain note: Swap 1/4 cup of the GF blend with sorghum flour for a hint of wheat-like flavor.
- Nut-free: Replace almond flour with more GF blend plus 1 tablespoon extra olive oil for tenderness.
- Dairy-free finish: Use plant-based cheese or go marinara-only with olives, mushrooms, and basil.
FAQ
Can I use active dry yeast instead of instant yeast?
Yes. Proof 2 teaspoons active dry yeast in 1/4 cup of the warm water with the sugar for 5–10 minutes until foamy.
Then add to the dry ingredients with the remaining liquids.
What if I don’t have psyllium husk powder?
You can try 1 tablespoon ground flaxseed plus 1 teaspoon xanthan gum, but the texture won’t be as chewy or elastic. For best results, use psyllium powder.
Which gluten-free flour blend works best?
Use a 1:1 baking blend with rice flour and starches like tapioca or potato. Brands vary in absorbency, so adjust water slightly.
Avoid blends that include bean flours for this recipe—those can taste strong and bake denser.
How do I keep the crust from getting soggy?
Par-bake the crust, keep sauces and toppings light, and bake hot on a preheated stone or pan. Let the pizza rest a few minutes on a rack so steam can escape.
Can I make this without yeast?
Yes, but expect a different texture. Increase baking powder to 2 teaspoons and skip the rest time.
The crust will be more biscuit-like and less chewy.
Why is my dough cracking when I shape it?
It’s likely a touch dry. Wet your hands and smooth the surface, or knead in 1–2 teaspoons of warm water. Lightly oiling your fingers also helps you press it out evenly.
Do I need a pizza stone?
No.
An upside-down heavy sheet pan preheated with the oven works well. Just keep the parchment under the dough for easy transfer.
Can I make mini pizzas?
Absolutely. Divide the dough into 2–3 portions and shape smaller rounds.
Reduce par-bake and final bake times by 1–2 minutes and keep an eye on color.
What’s the best way to reheat slices?
Use a dry skillet over medium heat, covered, for 4–6 minutes until the bottom is crisp and the cheese melts. Or reheat in a 425°F oven directly on a rack for 6–8 minutes.
Is this dough suitable for calzones or flatbreads?
It makes great flatbreads. For calzones, keep fillings light and seal edges well.
Par-bake the base briefly before filling to avoid a gummy center.
Final Thoughts
Gluten-free pizza doesn’t have to be a compromise. With a solid flour blend, a little psyllium, and a smart two-stage bake, you can make a crust that’s crisp, chewy, and genuinely satisfying. Keep your toppings balanced, keep your heat high, and let the dough rest just long enough to work its magic.
Once you get the feel for the texture, this becomes a weeknight regular you’ll be proud to serve. Enjoy pizza night the way it should be—simple, flavorful, and reliably good.