Homemade Pepperoni Pizza That Outsmarts Takeout
You don’t need a wood-fired oven or a chef’s hat to make restaurant-level pizza—just a hot oven, good dough, and a tiny bit of patience. One bite of this Homemade Pepperoni Pizza and you’ll wonder why your phone still has a delivery app.
It’s crisp at the edges, chewy in the middle, saucy, cheesy, and unapologetically loaded with pepperoni. This is the blueprint for game-night glory, date-night victory, or “I crushed Tuesday” energy.
Ready to build a pie that disappears in minutes?

Why This Recipe Works
This method hits three pillars of great pizza: high heat, hydrated dough, and balanced toppings. A well-hydrated dough creates that coveted crispy-chewy crust without tasting like cardboard.
Preheating a pizza stone or steel stores heat like a rocket booster, giving you serious oven spring and char.
Meanwhile, a simple sauce—uncooked, bright, and lightly seasoned—keeps things fresh while the low-moisture mozzarella and crisping pepperoni bring the gooey, salty magic. The result?
A pie that tastes expensive but costs less than a coffee run.
Servings, Prep time, Cooking time, Calories
- Servings: 2 large pizzas (3–4 people)
- Prep Time: 20 minutes (plus dough rise: 60–90 minutes or overnight)
- Cook Time: 8–12 minutes per pizza
- Calories: ~320–360 per slice (1/8 of a 12–14″ pizza), varies by toppings
Ingredient Essentials
- For the dough:
- 3 1/2 cups (440g) bread flour (or 00 flour)
- 1 1/3 cups (315g) warm water, ~100°F
- 2 tsp (7g) fine sea salt
- 1 tsp (3g) instant yeast
- 1 tbsp (12g) sugar or honey (optional, helps browning)
- 1 tbsp (15g) olive oil (optional for tenderness)
- For the sauce:
- 1 can (14–15 oz) crushed or whole peeled tomatoes, hand-crushed
- 1–2 cloves garlic, minced
- 1 tsp dried oregano
- 1/2 tsp salt, more to taste
- 1 tbsp olive oil
- Pinch of red pepper flakes (optional)
- For the toppings:
- 12–16 oz low-moisture mozzarella, grated
- 4–6 oz pepperoni, sliced (cup-and-char style if available)
- Fresh basil leaves, torn (optional)
- Freshly grated Parmesan (optional)
- Olive oil for brushing the crust
- Gear: Pizza stone or steel (recommended), pizza peel, parchment (backup), large bowl
The Method – Instructions
- Make the dough. In a large bowl, whisk flour, salt, and yeast. Add warm water, sugar/honey, and olive oil.
Mix until shaggy. Knead 6–8 minutes until smooth and slightly tacky.
If sticky, add a tablespoon of flour; if dry, a splash of water.
- Let it rise. Place dough in a lightly oiled bowl, cover, and rise at room temp 60–90 minutes until doubled. For better flavor, cold-ferment: refrigerate 12–48 hours, then bring to room temp for 60 minutes before shaping.
- Preheat like you mean it. Put a stone/steel on the middle rack.
Preheat oven to the highest setting (500–550°F) for at least 45 minutes. This heat is your secret weapon.
- Mix the sauce. Stir tomatoes, garlic, oregano, salt, olive oil, and red pepper flakes.
Taste and adjust salt. No cooking needed—let the oven do the magic.
- Divide and ball. Turn the dough onto a floured surface.
Divide into 2 equal pieces. Form tight balls by tucking edges under.
Rest 15 minutes under a damp towel.
- Shape the crust. Dust your hands and surface with flour or semolina. Press a dough ball into a disk, leaving a thicker rim.
Lift and stretch over your knuckles, rotating until 12–14 inches wide. Avoid using a rolling pin (it crushes bubbles).
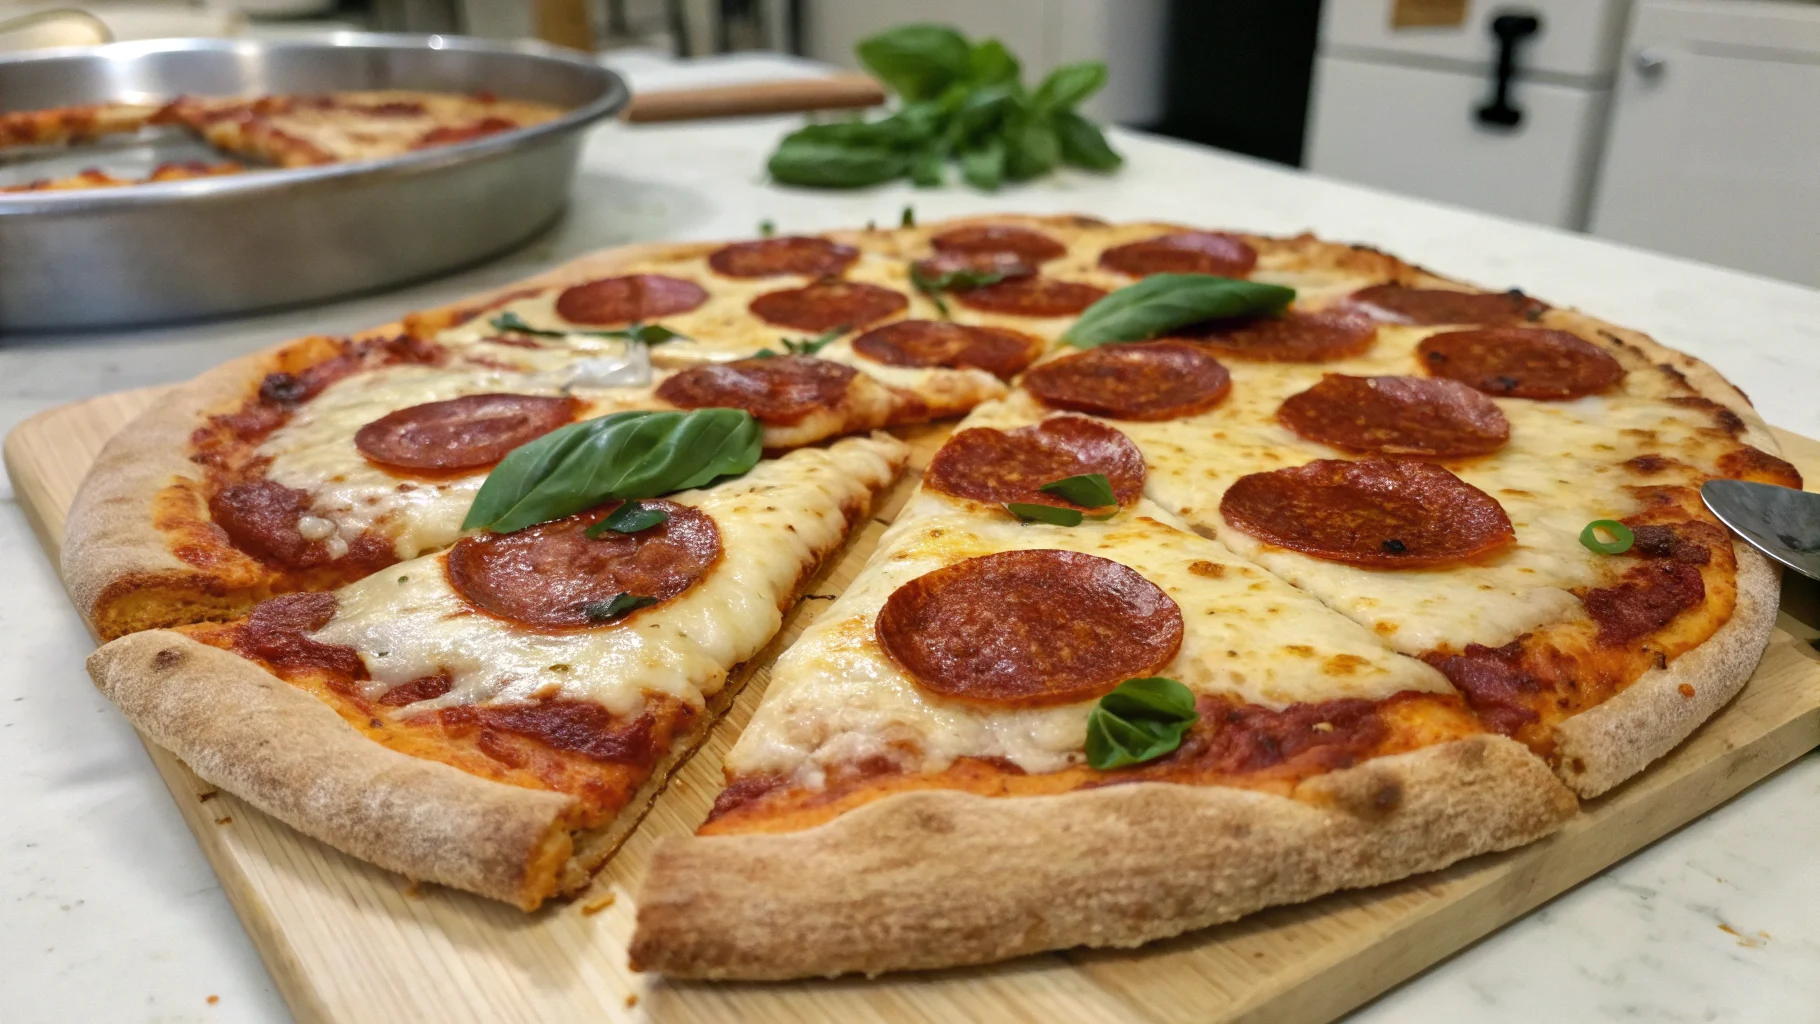
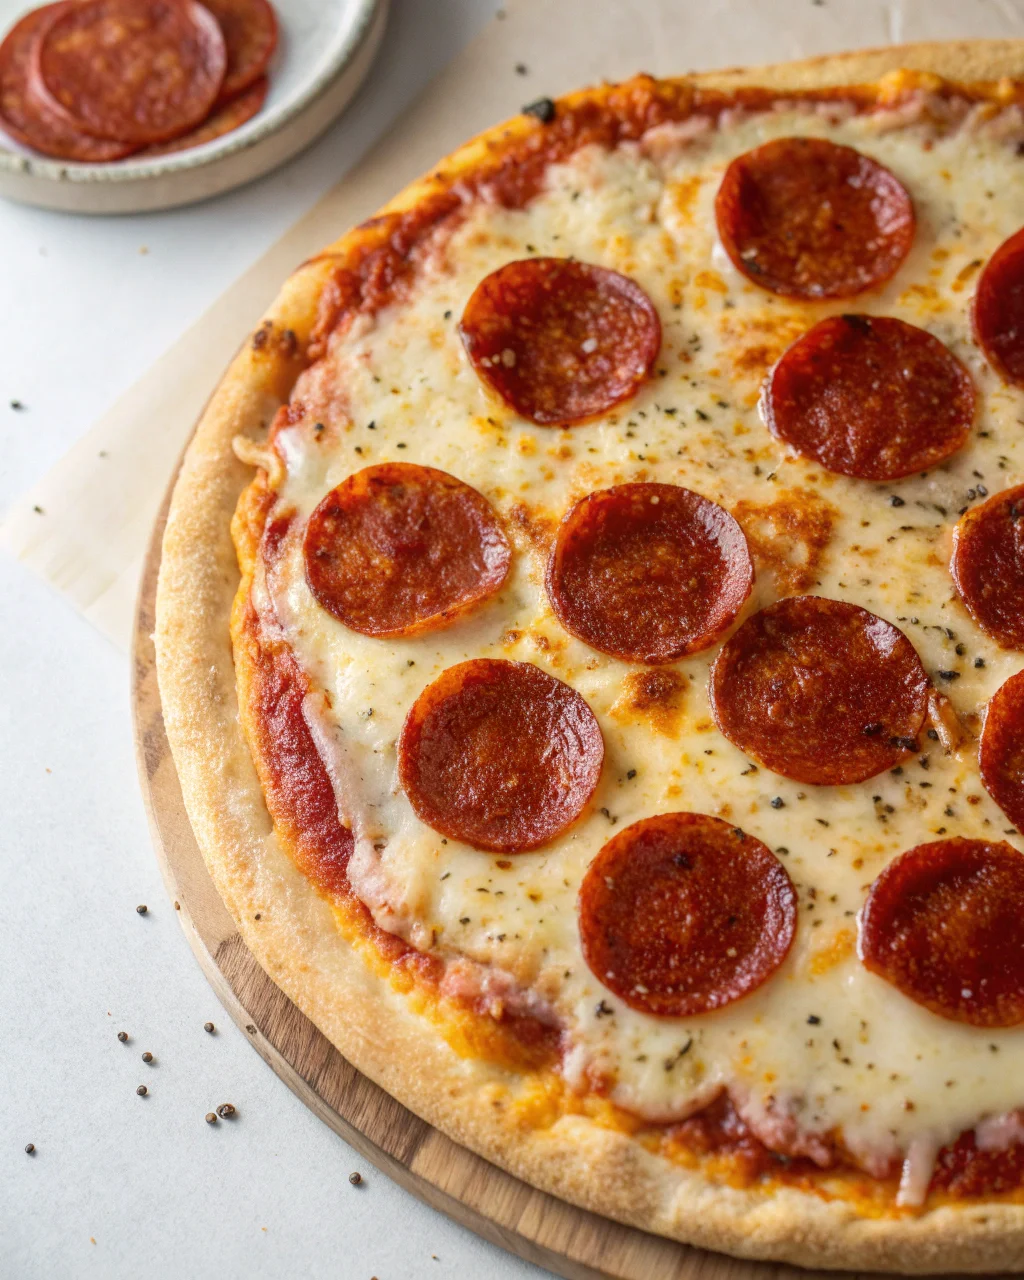
- Build the pie. Transfer to a lightly floured peel (or parchment).
Spread a thin layer of sauce—about 1/3–1/2 cup. Add an even layer of mozzarella.
Top with pepperoni, spacing for crisp edges. Brush the outer crust with a bit of olive oil.
- Bake hot and fast. Slide onto the stone/steel.
Bake 6–8 minutes, then rotate and bake 2–4 more until the cheese bubbles and spots brown, and pepperoni curls and crisps. Crust should be deeply golden.
- Finish and rest. Transfer to a rack or board.
Sprinkle Parmesan and torn basil if desired. Let it rest 2–3 minutes so cheese sets (yes, waiting is pain, but worth it).
- Repeat with the second dough. Keep the momentum—your oven is primed for greatness.
Storage Made Simple
- Leftovers: Cool completely, then refrigerate slices in an airtight container up to 4 days.
- Reheat: Skillet over medium heat with a lid for 3–5 minutes, or 425°F oven for 6–8 minutes.
Air fryer works too—380°F for 3–5 minutes. Microwave only if you enjoy soggy sadness.
- Freezer: Freeze slices on a tray, then bag for up to 2 months.
Reheat from frozen at 425°F for 10–12 minutes.
- Make-ahead dough: After the first rise, refrigerate up to 48 hours. Flavor improves, effort decreases—win-win.
Health Benefits
Homemade means control.
You pick quality tomatoes with lycopene, a potent antioxidant linked to heart health. You choose cheese amounts, cutting back a bit for fewer calories without sacrificing joy.
Pepperoni brings protein and iron; balance it with a crisp salad and you’ve got a solid meal, IMO.
Using olive oil keeps saturated fat in check versus heavy butter-based crusts. Plus, a thin layer of sauce and moderate cheese keeps sodium realistic.
Not health food, but definitely health-smart compared to mystery-box takeout.
Nutrition Stats
- Per slice (approx., 1/8 of a 12–14″ pizza):
- Calories: 320–360
- Protein: 14–18g
- Carbs: 32–38g
- Fat: 12–16g
- Sodium: 550–750mg
- Fiber: 2–3g
Numbers vary with cheese pile height, pepperoni count, and crust thickness—aka your personality on a pan.
Mistakes That Ruin the Recipe
- Skipping the preheat: A lukewarm oven equals pale, floppy crust. Heat that stone/steel properly.
- Overloading toppings: Too much sauce or cheese floods the crust and prevents crisping.
- Rolling pin assault: Smashes air pockets.
Hand-stretch for bubbles and chew.
- Wet mozzarella: Fresh mozzarella can drown your pie. If using, slice and blot thoroughly.
- Cold dough shaping: Dough needs to relax.
If it snaps back, it’s too cold—rest 10 more minutes.
- Forgetting the peel prep: Lightly flour or use semolina so the pizza actually slides. Rookie mistake, FYI.
Creative Twists
- Hot Honey Heat: Drizzle hot honey over the pepperoni post-bake.
Sweet-spicy insanity.
- Garlic Butter Crust: Brush baked crust with melted butter, garlic, and parsley.
- Double-Crisp Pepperoni: Pre-crisp slices in a skillet for 1–2 minutes; add to pizza mid-bake.
- Spicy Vodka Swirl: Dot a few spoonfuls of vodka sauce over the red sauce before cheese.
- Pepperoni-Mushroom Truffle: Add sautéed mushrooms and a micro-drizzle of truffle oil after baking.
- Gluten-Friendly: Use a 1:1 gluten-free flour blend designed for yeast doughs and add 1 tsp xanthan gum if needed.
FAQ
Can I use all-purpose flour instead of bread flour?
Yes. Bread flour gives more chew due to higher protein, but all-purpose still yields a great crust.
If using AP, reduce water by 1–2 tablespoons if the dough feels too sticky.
Do I need a pizza stone?
No, but it helps. A preheated baking steel is best; a stone is great; a flipped, preheated sheet pan works in a pinch.
Just go max heat and preheat longer.
What if my dough tears while stretching?
Let it rest 5–10 minutes and try again. Tiny tears can be pinched closed.
Dough resists when gluten is tight—time fixes it.
How do I prevent soggy pizza?
Use low-moisture mozzarella, keep sauce thin, and bake on a blazing-hot surface. If using watery toppings (like mushrooms), pre-sauté to drive off moisture.
Can I make it spicy without overpowering it?
Absolutely.
Add a pinch of red pepper flakes to the sauce and finish with hot honey or chili crisp after baking. Layered heat > napalm.
My Closing Thoughts
The difference between average pizza and unforgettable pizza isn’t luck—it’s heat, hydration, and restraint.
This Homemade Pepperoni Pizza nails all three without fancy gear or chef drama. Once you see those pepperoni cups crisp and curl, you’ll get it.
Make two pies, because the first one never survives the “taste test.”