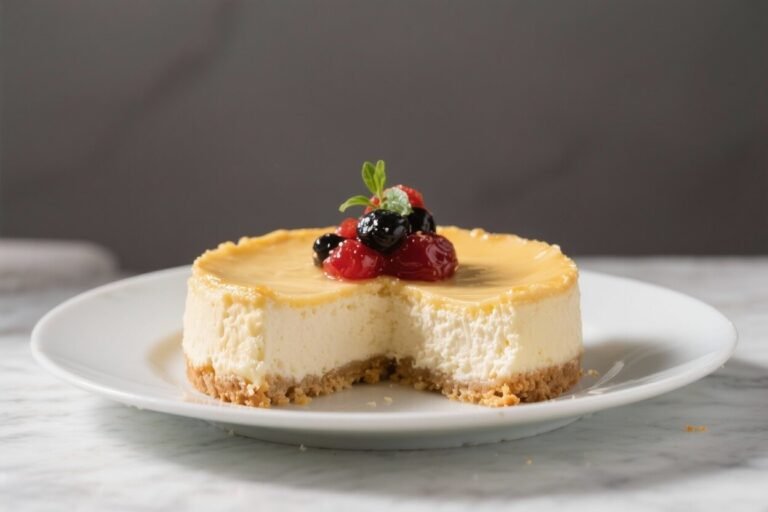
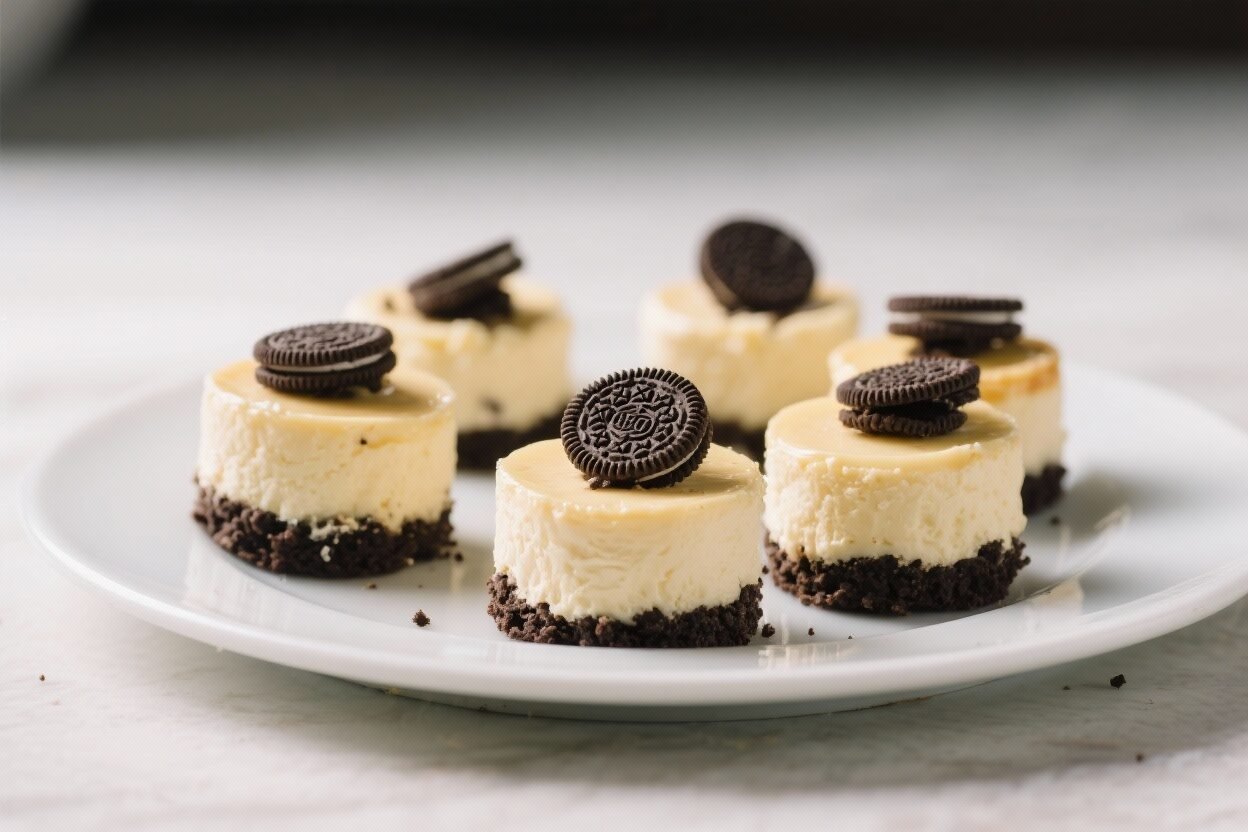
Mini Cheesecakes With Oreo Crust – Creamy, Cute, and Crowd-Pleasing
These mini cheesecakes deliver everything you love about a classic cheesecake in a bite-sized package. They’re creamy, smooth, and just the right amount of sweet, with a crunchy Oreo crust that makes them feel special. They’re the kind of treat that looks impressive but is surprisingly simple to make.
No water bath, no fuss—just mix, bake, chill, and enjoy. Perfect for parties, holidays, or a quick dessert fix during the week.
Mini Cheesecakes With Oreo Crust - Creamy, Cute, and Crowd-Pleasing
Ingredients
Method
- Prep the pan: Line a 12-cup muffin tin with paper liners. Place one whole Oreo flat-side down into each liner to form the crust.
- Preheat the oven: Set to 325°F (163°C).This slightly lower temperature helps keep the cheesecakes smooth and creamy.
- Soften the cream cheese: Let it sit at room temperature for 30–45 minutes. Soft cream cheese mixes smoothly and prevents lumps.
- Make the batter: In a mixing bowl, beat the cream cheese with an electric mixer on medium speed until creamy, about 1–2 minutes. Add sugar and beat until smooth.
- Add eggs: Beat in the eggs one at a time, mixing just until incorporated after each.Avoid overmixing to reduce air bubbles.
- Finish the filling: Add sour cream, vanilla, and a pinch of salt. Mix until silky and uniform. If using crushed Oreos or chocolate chips, fold them in gently with a spatula.
- Fill the cups: Divide the batter evenly among the liners, filling each almost to the top (about 3/4 full to slightly under the rim).
- Bake: Bake at 325°F for 16–20 minutes, or until the edges are set and the centers have a slight jiggle.They should not brown on top.
- Cool gradually: Let the pan cool on a rack for 15–20 minutes. Transfer cheesecakes to the rack to cool completely.
- Chill: Refrigerate for at least 2 hours, ideally 4 hours or overnight, for the best texture and flavor.
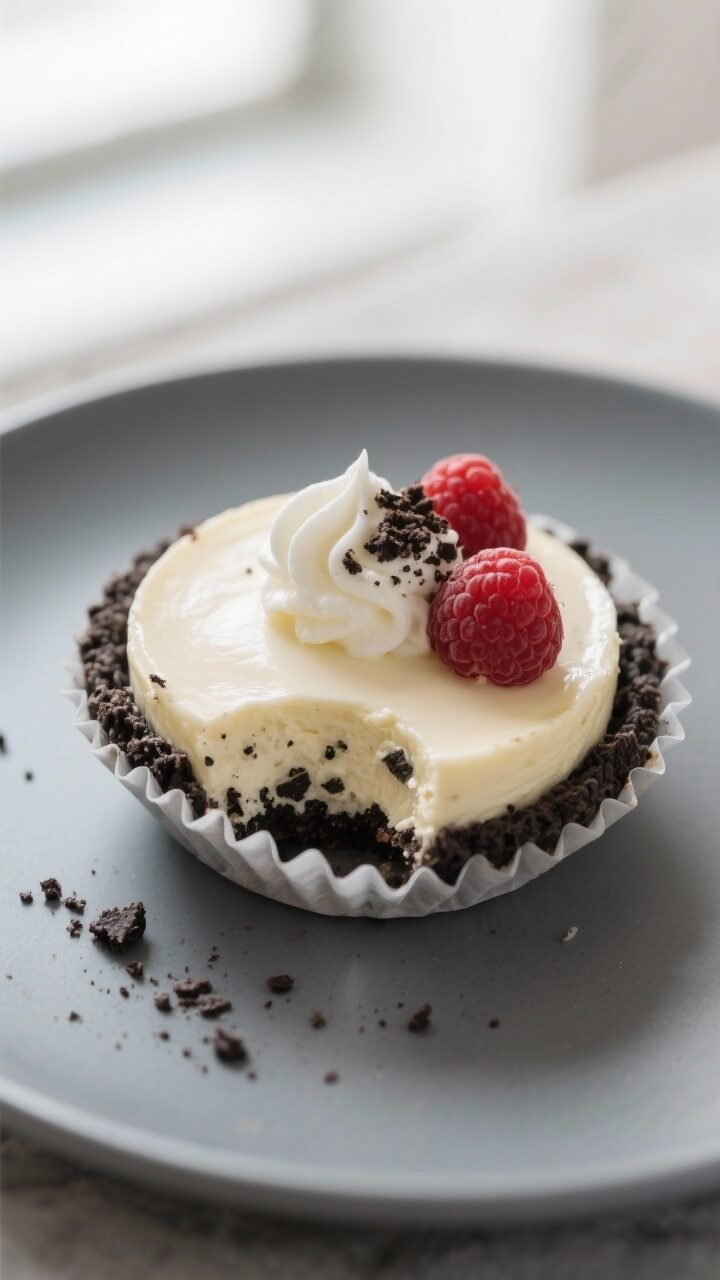
- Top and serve: Add whipped cream, berries, ganache, or a drizzle of caramel. Finish with a sprinkle of crushed Oreos if you like.
What Makes This Recipe So Good
- Effortless crust: Whole Oreos become the crust—no melting butter or pressing crumbs required.
- Foolproof texture: The batter comes together quickly and bakes evenly in a muffin pan, avoiding cracks and dryness.
- Customizable toppings: Fresh berries, chocolate drizzle, caramel, or whipped cream all work beautifully.
- Perfect portions: Individual servings make it easy for gatherings and portion control.
- Make-ahead friendly: They chill well and taste even better the next day.
Shopping List
- Oreo cookies: About 20–24 whole Oreos (1 per cheesecake, plus some extra if you want crushed cookies in the batter)
- Cream cheese: 16 oz (two 8-oz blocks), full-fat, softened
- Granulated sugar: 1/2 cup
- Eggs: 2 large, at room temperature
- Sour cream: 1/2 cup (or Greek yogurt)
- Vanilla extract: 1 teaspoon
- Salt: Pinch (about 1/8 teaspoon)
- Optional mix-ins: 1/2 cup crushed Oreos or mini chocolate chips
- Optional toppings: Whipped cream, fresh berries, chocolate ganache, caramel sauce, or crushed Oreo crumbs
- Pan liners: Standard muffin liners (12)
Step-by-Step Instructions
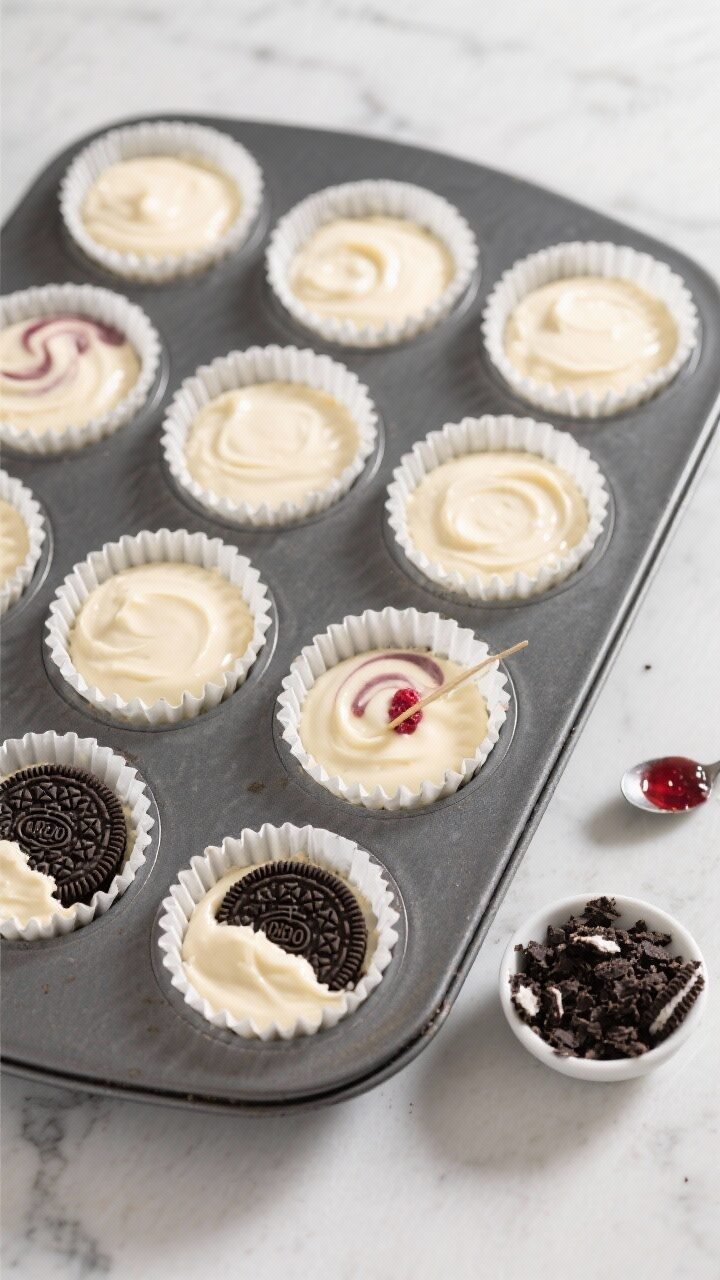
- Prep the pan: Line a 12-cup muffin tin with paper liners. Place one whole Oreo flat-side down into each liner to form the crust.
- Preheat the oven: Set to 325°F (163°C).This slightly lower temperature helps keep the cheesecakes smooth and creamy.
- Soften the cream cheese: Let it sit at room temperature for 30–45 minutes. Soft cream cheese mixes smoothly and prevents lumps.
- Make the batter: In a mixing bowl, beat the cream cheese with an electric mixer on medium speed until creamy, about 1–2 minutes. Add sugar and beat until smooth.
- Add eggs: Beat in the eggs one at a time, mixing just until incorporated after each.Avoid overmixing to reduce air bubbles.
- Finish the filling: Add sour cream, vanilla, and a pinch of salt. Mix until silky and uniform. If using crushed Oreos or chocolate chips, fold them in gently with a spatula.
- Fill the cups: Divide the batter evenly among the liners, filling each almost to the top (about 3/4 full to slightly under the rim).
- Bake: Bake at 325°F for 16–20 minutes, or until the edges are set and the centers have a slight jiggle.They should not brown on top.
- Cool gradually: Let the pan cool on a rack for 15–20 minutes. Transfer cheesecakes to the rack to cool completely.
- Chill: Refrigerate for at least 2 hours, ideally 4 hours or overnight, for the best texture and flavor.
- Top and serve: Add whipped cream, berries, ganache, or a drizzle of caramel. Finish with a sprinkle of crushed Oreos if you like.
Storage Instructions
- Refrigerator: Store in an airtight container for up to 5 days.Keep toppings separate until serving for the neatest look.
- Freezer: Freeze without toppings. Place cooled cheesecakes on a sheet pan to freeze solid, then transfer to a freezer bag or container for up to 2 months. Thaw in the fridge overnight.
- Make-ahead tip: Bake and chill the day before an event, then add toppings just before serving for the freshest presentation.
Why This is Good for You
- Built-in portion control: Mini servings make it easier to enjoy dessert without overdoing it.
- Protein from dairy: Cream cheese and sour cream deliver a small protein boost compared to many desserts.
- Flexibility for swaps: You can use reduced-fat dairy, Greek yogurt, or cut the sugar slightly and still get great results.
- Mindful indulgence: A rich, satisfying bite often means you’re content with less.
What Not to Do
- Don’t skip softening the cream cheese: Cold cream cheese creates lumps that won’t fully blend.
- Don’t overmix the batter: Too much air leads to cracks and uneven baking.
- Don’t bake at a high temperature: Higher heat can cause puffing, cracking, and a dry texture.
- Don’t skip the chill time: The cheesecake sets and develops flavor as it chills.Serving too soon means a looser texture.
- Don’t overload with wet toppings: Add sauces and fruit right before serving to avoid soggy tops and liners.
Recipe Variations
- Mint Cookies & Cream: Add 1/2 teaspoon peppermint extract and fold in crushed mint Oreo pieces. Top with chocolate drizzle.
- Berry Swirl: Spoon 1/2 teaspoon raspberry or strawberry jam on each cheesecake before baking. Swirl gently with a toothpick.
- Chocolate Lover’s: Mix 2 tablespoons cocoa powder into the batter and fold in mini chocolate chips.Finish with ganache.
- Peanut Butter Cup: Whisk 1/4 cup creamy peanut butter into the batter. Top with chopped mini peanut butter cups after chilling.
- Lemon Cheesecake Minis: Add 1 tablespoon fresh lemon zest and 1 tablespoon lemon juice. Top with lemon curd.
- Salted Caramel: Drizzle caramel over chilled cheesecakes and finish with a small pinch of flaky sea salt.
- Gluten-Free Option: Use gluten-free chocolate sandwich cookies for the crust; the rest of the batter is naturally gluten-free.
FAQ
Can I make these without a mixer?
Yes.
Use very soft cream cheese and whisk thoroughly by hand, or use a sturdy silicone spatula. Mix until smooth, but avoid whipping in too much air.
Why did my cheesecakes crack?
Cracks usually come from overmixing or baking at too high a temperature. Make sure the oven is at 325°F, mix only until combined, and let them cool gradually before chilling.
How do I know when they’re done?
The edges should look set while the centers still wobble slightly when you nudge the pan.
They’ll firm up as they cool and chill.
Can I use reduced-fat cream cheese?
You can, but the texture will be lighter and slightly less creamy. For best results, use full-fat or a mix of full-fat and reduced-fat.
What can I use instead of sour cream?
Plain Greek yogurt works well and adds a gentle tang. Use the same amount and avoid flavored or sweetened varieties.
Do I need to remove the Oreo filling?
No.
The cream filling helps the cookie adhere and adds sweetness. Just drop the whole cookie into the liner as-is.
Can I bake these without liners?
Liners make removal easy and keep the crust intact. If you skip them, grease the muffin tin very well and allow the cheesecakes to cool completely before loosening with a thin knife.
How far in advance can I make them?
They’re excellent when made 24 hours in advance.
Store them chilled and add toppings just before serving.
How can I make them extra smooth?
Ensure all ingredients are room temperature, especially the cream cheese and eggs. Strain the batter through a fine mesh sieve if you want an ultra-smooth finish.
Can I double the recipe?
Yes. Bake in two muffin pans, rotating halfway.
Keep the same oven temperature and check for doneness around the 16-minute mark, adding time only as needed.
Wrapping Up
Mini Cheesecakes with Oreo Crust are the kind of dessert that feels special without demanding much time or effort. They bake quickly, chill beautifully, and adapt to whatever topping you’re craving. Keep a batch in the fridge or freezer and you’ll always be ready for guests—or a sweet moment just for you.
With simple ingredients and dependable results, this recipe is one you’ll come back to again and again.