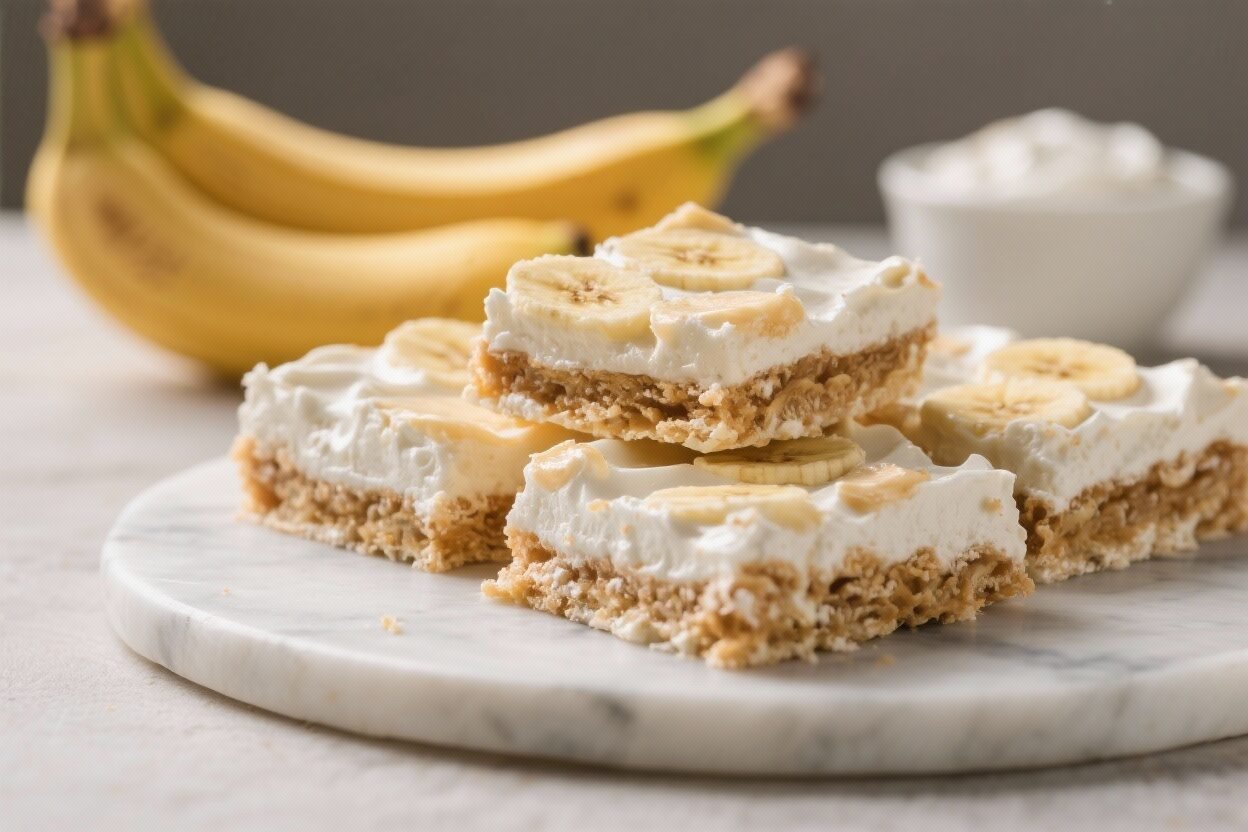
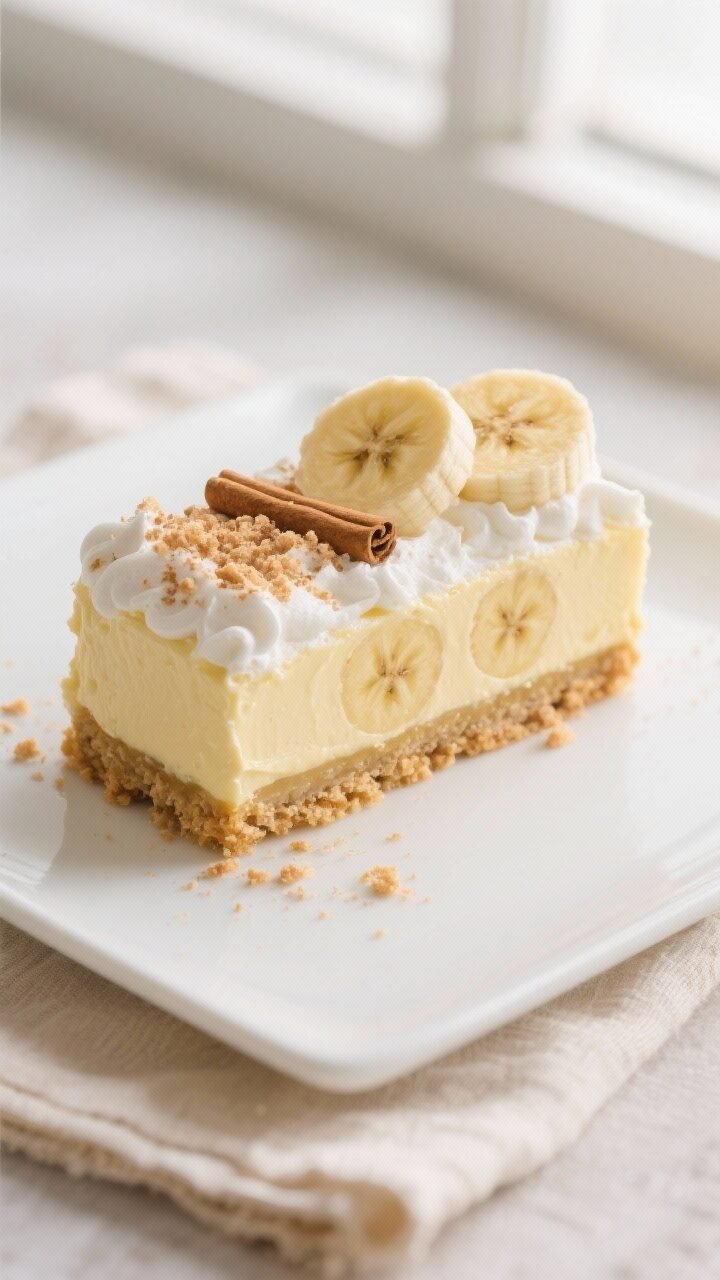
No-Bake Banana Pudding Bars – Creamy, Comforting, and Easy
These No-Bake Banana Pudding Bars are the kind of dessert you make once and then crave all week. They’re creamy, layered, and full of classic banana pudding flavor, but without ever turning on the oven. The texture is a perfect mix of silky pudding, soft bananas, and a buttery cookie crust.
They’re also simple to assemble, which makes them great for gatherings, meal prep, or a late-night sweet tooth. If you love banana pudding but want a cleaner, more sliceable version, this is it.
No-Bake Banana Pudding Bars – Creamy, Comforting, and Easy
Ingredients
Method
- Prep the pan: Line an 8x8- or 9x9-inch square pan with parchment, letting it hang over the edges for easy lifting. Lightly grease the sides.
- Make the crust: Pulse vanilla wafers or grahams into fine crumbs.Mix with melted butter and sugar until the texture feels like wet sand. Press firmly into the pan in an even layer. Chill for 10–15 minutes while you make the filling.
- Whisk the pudding: In a large bowl, whisk instant pudding mix with cold milk for 2 minutes until thickened.Let it sit for another 2–3 minutes.
- Beat the cream cheese layer: In a separate bowl, beat softened cream cheese until smooth. Add sweetened condensed milk and vanilla, and beat until silky with no lumps.
- Fold in the pudding: Gently fold the thickened pudding into the cream cheese mixture. Aim for a smooth, fluffy consistency.
- Slice the bananas: Cut bananas into 1/4-inch coins.Pat gently with a paper towel if very moist to prevent slipping layers.
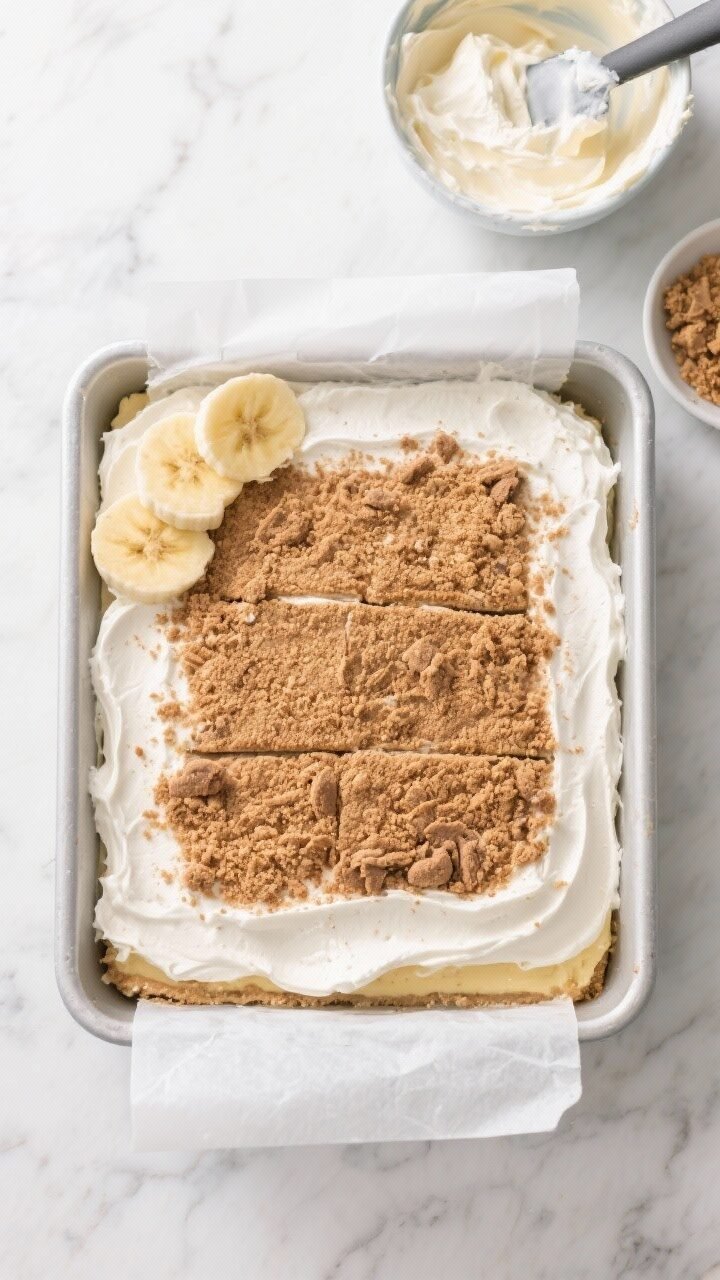
- Layer it up: Spread half the cream layer over the chilled crust. Add a single layer of banana slices. Top with the remaining cream layer and smooth the surface.
- Add the topping: Spread whipped topping evenly over the cream layer.If you like, sprinkle crushed cookies or a light dusting of cinnamon on top.
- Chill to set: Cover and refrigerate for at least 4 hours, preferably overnight. This helps the bars slice cleanly and the flavors meld.
- Slice and serve: Lift out using the parchment overhang. Cut into bars with a sharp, clean knife.Wipe the blade between cuts for neat slices. Garnish with fresh banana slices right before serving if desired.
What Makes This Recipe So Good
- No baking required: The fridge does all the work for you, and you’ll keep your kitchen cool.
- Dreamy texture: A buttery cookie crust, creamy banana filling, and a cloud of whipped topping on top.
- Familiar flavors, better format: All the nostalgia of classic banana pudding, but in tidy bars that slice cleanly.
- Make-ahead friendly: The bars set up beautifully overnight and taste even better the next day.
- Budget-friendly ingredients: Pantry staples and a few fresh bananas are all you need.
What You’ll Need
- Cookies for the crust: Vanilla wafer cookies or graham crackers (about 2 cups crumbs)
- Unsalted butter: Melted, to bind the crust (5–6 tablespoons)
- Granulated sugar: A touch for the crust (1–2 tablespoons)
- Bananas: Ripe but firm, for layering (3–4 medium)
- Instant vanilla pudding mix: Two 3.4-ounce boxes, or one large 5.1-ounce box plus a small box
- Cold milk: Whole or 2% works best (3 cups)
- Cream cheese: Softened to room temperature (8 ounces)
- Sweetened condensed milk: For extra silkiness and sweetness (1/2 cup)
- Vanilla extract: For a warm, round flavor (1 teaspoon)
- Whipped topping: Thawed (8 ounces), or homemade whipped cream
- Optional garnish: Extra cookie crumbs, banana slices, or a dusting of cinnamon
Step-by-Step Instructions
- Prep the pan: Line an 8×8- or 9×9-inch square pan with parchment, letting it hang over the edges for easy lifting. Lightly grease the sides.
- Make the crust: Pulse vanilla wafers or grahams into fine crumbs.
Mix with melted butter and sugar until the texture feels like wet sand. Press firmly into the pan in an even layer. Chill for 10–15 minutes while you make the filling.
- Whisk the pudding: In a large bowl, whisk instant pudding mix with cold milk for 2 minutes until thickened.
Let it sit for another 2–3 minutes.
- Beat the cream cheese layer: In a separate bowl, beat softened cream cheese until smooth. Add sweetened condensed milk and vanilla, and beat until silky with no lumps.
- Fold in the pudding: Gently fold the thickened pudding into the cream cheese mixture. Aim for a smooth, fluffy consistency.
- Slice the bananas: Cut bananas into 1/4-inch coins.
Pat gently with a paper towel if very moist to prevent slipping layers.
- Layer it up: Spread half the cream layer over the chilled crust. Add a single layer of banana slices. Top with the remaining cream layer and smooth the surface.
- Add the topping: Spread whipped topping evenly over the cream layer.
If you like, sprinkle crushed cookies or a light dusting of cinnamon on top.
- Chill to set: Cover and refrigerate for at least 4 hours, preferably overnight. This helps the bars slice cleanly and the flavors meld.
- Slice and serve: Lift out using the parchment overhang. Cut into bars with a sharp, clean knife.
Wipe the blade between cuts for neat slices. Garnish with fresh banana slices right before serving if desired.
Keeping It Fresh
Store the bars covered in the fridge for up to 3 days. The texture holds best if you add any fresh banana garnish just before serving.
If you want to make these more than a day ahead, consider brushing banana slices with lemon juice or pineapple juice before layering to slow browning. For freezing, the texture can become a bit icy after thawing, but it’s possible: wrap tightly and freeze for up to 1 month, then thaw in the fridge overnight.
Health Benefits
- Bananas: A good source of potassium and vitamin B6, which support heart health and energy metabolism.
- Calcium from milk: If you use dairy, the pudding provides calcium for bone health.
- Portion control: Bars make it easier to cut manageable servings compared to a scoop-style dessert.
- Customizable sweetness: You can reduce added sugar by using less sweetened condensed milk or choosing a lighter whipped topping.
Pitfalls to Watch Out For
- Soupy filling: Use cold milk for the instant pudding and give it time to thicken before folding into the cream cheese mixture.
- Soggy crust: Press the crust firmly and chill it. Avoid overly ripe bananas that leak moisture into the layers.
- Brown bananas: Choose bananas that are yellow with few brown spots.
Slice just before layering, or brush lightly with lemon juice.
- Lumpy cream layer: Ensure cream cheese is fully softened and beat until smooth before adding other ingredients.
- Runny slices: Chill long enough—at least 4 hours, ideally overnight—so the bars set and slice cleanly.
Variations You Can Try
- Peanut butter twist: Swirl 1/3 cup creamy peanut butter into the cream layer, and use peanut butter cookies for the crust.
- Chocolate banana: Use chocolate wafer cookies for the crust and fold a handful of mini chocolate chips into the filling.
- Salted caramel: Drizzle caramel sauce between the layers and sprinkle a pinch of flaky sea salt on top.
- Lighter version: Use reduced-fat cream cheese, light whipped topping, and a smaller amount of sweetened condensed milk.
- Gluten-free: Choose certified gluten-free cookies for the crust.
- From-scratch whipped cream: Swap whipped topping with 1 cup heavy cream whipped with 2 tablespoons powdered sugar and 1/2 teaspoon vanilla.
FAQ
Can I use banana pudding mix instead of vanilla?
Yes, banana pudding mix will boost the banana flavor. If you use it, you can skip the vanilla extract or keep it for extra warmth.
How do I keep the bananas from turning brown?
Use firm, just-ripe bananas and slice them right before layering. Lightly brushing slices with lemon or pineapple juice helps slow oxidation without changing the taste much.
Can I make this a day in advance?
Absolutely.
In fact, the bars taste better after chilling overnight. Wait to add any fresh banana garnish until serving.
What size pan works best?
An 8×8-inch pan yields taller bars, while a 9×9-inch pan gives slightly shorter bars. Both work well as long as you chill thoroughly.
Can I use homemade pudding?
Yes, but make sure it’s quite thick before assembling.
A looser pudding may result in softer bars that don’t slice as cleanly.
What if I don’t have cream cheese?
Mascarpone or a thick Greek yogurt blend can work in a pinch. If using yogurt, strain it to remove excess liquid and expect a slightly tangier flavor.
How many servings does this make?
Depending on how you slice, you’ll get 9 large bars or up to 16 smaller ones. For parties, smaller squares are easier to serve.
Can I reduce the sweetness?
Yes.
Use less sweetened condensed milk, choose a plain whipped cream topping, and consider graham crackers over vanilla wafers for a less sweet crust.
In Conclusion
No-Bake Banana Pudding Bars deliver everything you love about classic banana pudding, without the fuss. They’re cool, creamy, and easy to assemble, making them a reliable go-to for busy weeknights or casual get-togethers. With a handful of pantry staples and a few ripe bananas, you’ll have a crowd-pleasing dessert that sets up beautifully in the fridge.
Keep this recipe in your back pocket—you’ll find yourself making it again and again.