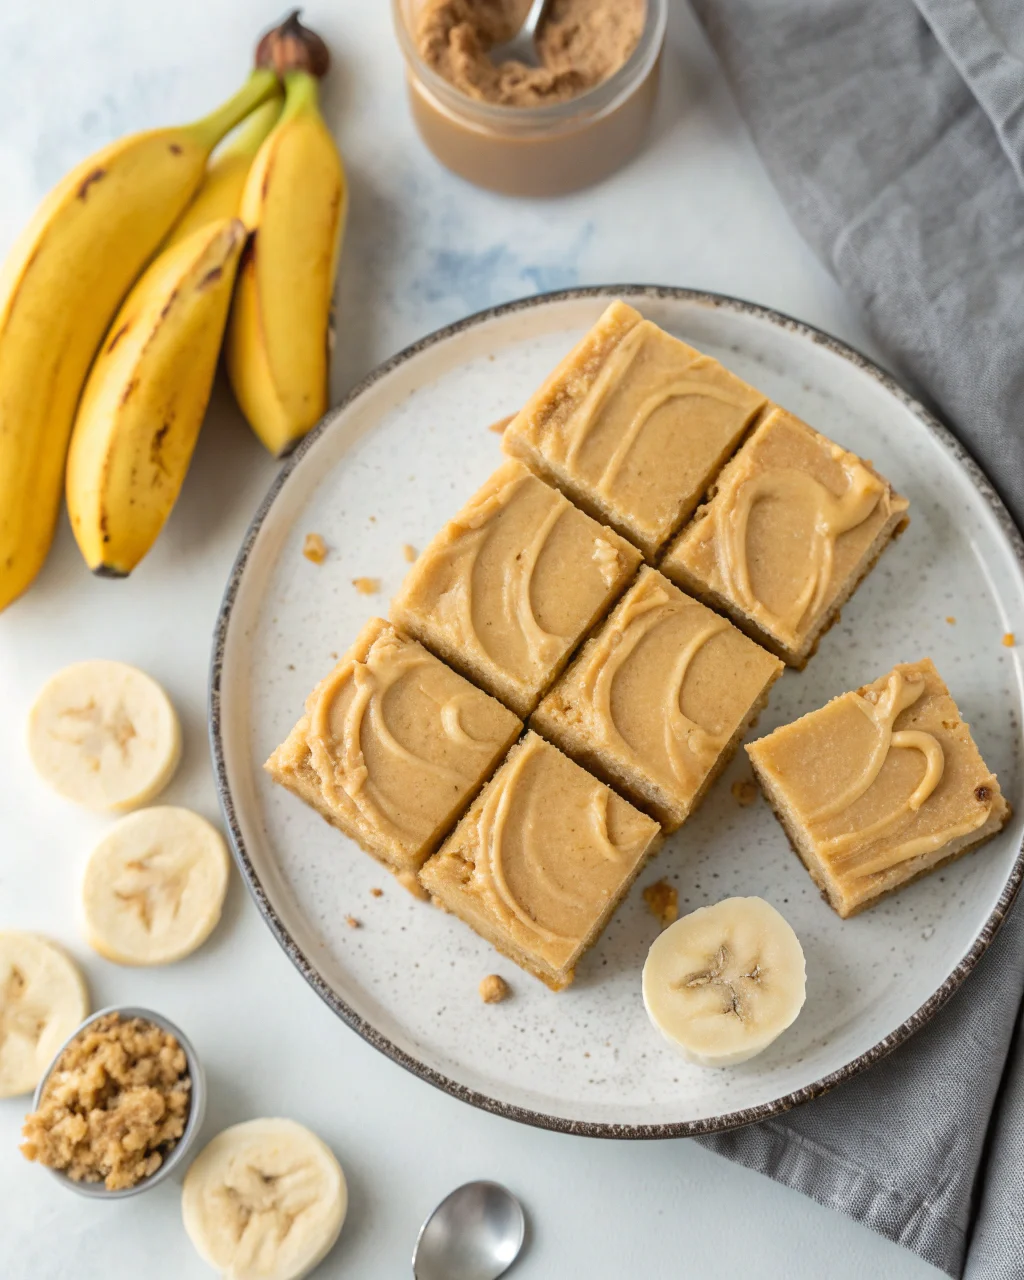
Peanut Butter Banana Pudding Bars: The No-Bake Showstopper
Forget dessert debates—this is the bar that ends them. Creamy banana pudding meets salty-smooth peanut butter, stacked into a no-bake slab that looks bakery-fancy and eats like childhood nostalgia with grown-up swagger. You’ll spend 20 minutes assembling it and spend the next day swatting hands away from the fridge.
It’s crunchy, creamy, sweet, salty, and shamelessly addictive. If your dessert doesn’t disappear in an hour, double the batch next time.

The Secret Behind This Recipe
The magic is contrast. You get a buttery cookie crust, a plush peanut butter cream layer, and a banana-studded pudding that sets just firm enough to slice clean.
The trick is stabilizing the pudding and cream so the bars hold shape without becoming rubbery. A touch of cream cheese in the peanut butter layer adds structure and tang; instant pudding plus cold milk keeps the top layer silky yet sliceable. And yes, real bananas—because banana flavoring is not invited.
Servings, Prep Time, Cooking Time, Calories
- Servings: 12 bars
- Prep Time: 20 minutes
- Chill Time: 4–6 hours (overnight best)
- Cooking Time: 0 minutes (no-bake)
- Estimated Calories: ~310 per bar
Ingredient Checklist
- Crust:
- 2 cups vanilla wafer crumbs (about 8 oz)
- 6 tablespoons unsalted butter, melted
- 2 tablespoons light brown sugar
- Pinch of fine sea salt
- Peanut Butter Layer:
- 8 oz cream cheese, softened
- 3/4 cup creamy peanut butter (no-stir style)
- 1/3 cup powdered sugar
- 1 teaspoon vanilla extract
- 1 cup cold heavy whipping cream
- Banana Pudding Layer:
- 1 (3.4 oz) box instant vanilla pudding mix
- 1 3/4 cups cold whole milk
- 2 large ripe bananas, sliced
- Topping:
- 1 cup cold heavy whipping cream
- 1 tablespoon powdered sugar
- 1/4 cup crushed vanilla wafers or roasted peanuts (optional)
- Warm peanut butter drizzle or melted chocolate (optional)
Instructions
- Prep the pan. Line an 8×8-inch pan with parchment, leaving overhang for easy lifting.
This is your insurance policy against sticky disasters.
- Build the crust. Mix wafer crumbs, melted butter, brown sugar, and salt until the texture resembles wet sand. Press firmly into the pan using the bottom of a measuring cup. Chill 10 minutes to set.
- Whip the peanut cream. Beat cream cheese, peanut butter, powdered sugar, and vanilla until smooth.
In a separate bowl, whip 1 cup cold cream to soft peaks. Fold the whipped cream into the peanut mixture until just combined.
- Spread the peanut layer. Spoon onto the crust and smooth evenly. This layer is the glue that locks in the bananas later.
Chill while you make the pudding.
- Make the pudding. Whisk instant pudding and cold milk for 2 minutes until thickened. Let it sit for 3 minutes to finish setting. Don’t over-whisk or it’ll get gummy—calm hands win.
- Add bananas. Scatter sliced bananas over the peanut layer in a single layer.
Top with the pudding, smoothing to the edges. Lightly tap the pan to settle air bubbles.
- Whipped topping. Whip remaining 1 cup cream with 1 tablespoon powdered sugar to medium peaks. Spread over the pudding.
Sprinkle crushed wafers or peanuts if using.
- Chill to set. Cover and refrigerate 4–6 hours, preferably overnight, to firm up the layers. Slice with a hot, dry knife for clean edges.
- Optional drizzle. Warm 2 tablespoons peanut butter or melted chocolate and zigzag over the top right before serving. Because drama matters.
Preservation Guide
- Fridge: Keep covered and refrigerated up to 3 days.
The bananas will soften but stay tasty.
- Prevent browning: Lightly mist banana slices with lemon juice before assembly, or tuck them fully under the pudding layer. Minimal air exposure = fresher look.
- Freezer: Freeze without the whipped topping for up to 1 month. Wrap well.
Thaw overnight in the fridge and add fresh topping before serving.
- Make-ahead: Assemble crust + peanut layer up to 48 hours ahead. Add bananas, pudding, and topping the day you serve.
Why This is Good for You
This isn’t kale, but it’s not chaos either. Bananas bring potassium and prebiotic fiber; peanuts add plant protein and healthy fats that keep you satisfied.
Using real whipped cream avoids mystery oils hiding in some frozen toppings. Portion control is built in—clean slices, easy serving, fewer “oops, I ate half” moments (no promises, though).
Nutrition Stats
- Per bar (1 of 12): ~310 calories
- Protein: ~6–7 g
- Carbs: ~28–32 g
- Sugars: ~18–22 g
- Fat: ~19–21 g (about half from peanuts)
- Fiber: ~2 g
- Sodium: ~160–220 mg
Note: Numbers vary by brand, peanut butter type, and how heavy your drizzle hand is.
Common Blunders
- Using natural peanut butter that separates. The oil can make the layer greasy and unstable. Go for a no-stir brand.
- Over-whipping pudding. Vigorous whisking breaks it down and turns it runny.
Whisk, rest, done.
- Warm ingredients. If your cream or cream cheese is too warm, you lose structure. Keep dairy cold for whipping; soften cream cheese just to workable.
- Skipping chill time. Impatience = messy squares. Chill a minimum of 4 hours; overnight is ideal.
- Bananas on top. They brown fast.
Keep them buried under pudding or lightly mist with lemon juice.
Different Ways to Make This
- Chocolate twist: Swap vanilla wafers for chocolate wafers or Oreos (skip added sugar in crust). Drizzle with dark chocolate.
- Salty crunch: Add a thin layer of chopped roasted peanuts between peanut layer and bananas. Texture wins.
- Gluten-free: Use gluten-free vanilla wafers.
Everything else stays the same—easy win.
- High-protein hack: Replace 2 ounces of cream cheese with vanilla Greek yogurt and reduce powdered sugar slightly. Slightly tangier, still lush.
- Vegan version: Use vegan cream cheese, coconut whipped cream, plant milk for pudding, and vegan cookies. Choose a dairy-free instant pudding brand that sets with plant milk (FYI, some don’t—test first).
- Caramel vibe: Drizzle salted caramel over the peanut layer before bananas.
It’s extra, and it’s worth it.
FAQ
Can I use cooked pudding instead of instant?
Yes, but let it cool fully until thickened and cold before spreading. Warm pudding will melt the lower layers and wreck the structure.
What bananas are best?
Use ripe, yellow bananas with minimal brown spots—sweet but not mushy. Overripe bananas taste great but smear and don’t slice neatly.
Can I make this in a 9×13 pan?
Absolutely.
Double the recipe for a party-size tray. Chill time may increase by 1–2 hours due to thicker layers.
How do I get clean slices?
Chill overnight, then use a sharp knife dipped in hot water and wiped dry between cuts. Slow, confident presses beat sawing motions.
Is there a lower-sugar option?
Use sugar-free instant pudding, reduce powdered sugar in the peanut layer to 2 tablespoons, and choose lightly sweetened wafers.
Flavor stays strong without the sugar bomb.
Can I swap peanut butter for another nut butter?
Yes. Almond or cashew butter works; choose no-stir types. The flavor will be milder, so add a pinch of salt to brighten it.
My Closing Thoughts
These Peanut Butter Banana Pudding Bars punch way above their weight.
Minimal effort, maximum applause—that’s the game. The layers stack like a dessert skyscraper, and every bite hits sweet, salty, creamy, crunchy. Make them once and they’ll haunt your grocery list in the best way.
Share if you must, but IMO, stash two bars in the back of the fridge labeled “salad.”