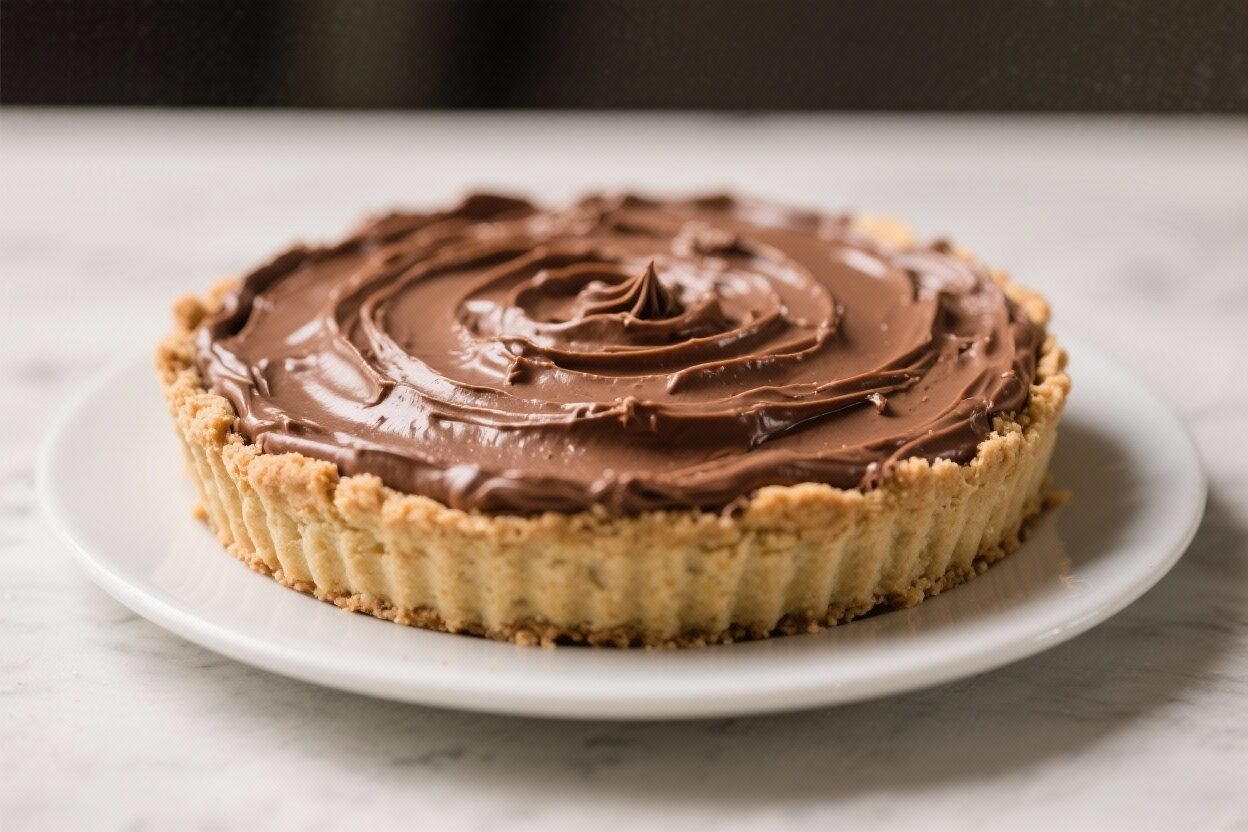
No-Bake Chocolate Cream Pie – Silky, Simple, and Crowd-Pleasing
This no-bake chocolate cream pie is rich, silky, and surprisingly easy to make. It’s the kind of dessert that looks fancy but takes minimal effort, no oven required. The filling is smooth and chocolatey, the crust is buttery and crisp, and the whipped cream topping ties it all together.
Whether you’re hosting a dinner or craving a weeknight treat, this pie delivers every time.
No-Bake Chocolate Cream Pie - Silky, Simple, and Crowd-Pleasing
Ingredients
Method
- Prepare the crust. In a bowl, mix the cookie crumbs, sugar, and salt. Pour in the melted butter and stir until the mixture resembles wet sand.
- Press and chill. Firmly press the crumb mixture into a 9-inch pie dish, covering the bottom and sides evenly. Use a flat-bottomed glass for a tight, compact crust.Chill in the fridge for at least 20 minutes.
- Start the filling base. In a medium saucepan, whisk together sugar, cornstarch, and salt. Add the milk (and cream, if using) gradually, whisking until smooth. Whisk in the egg yolks.
- Cook until thickened. Place the pan over medium heat and cook, whisking constantly, until the mixture thickens and starts to bubble, 5–7 minutes.Let it bubble for 30–60 seconds while whisking to cook off the starch taste.
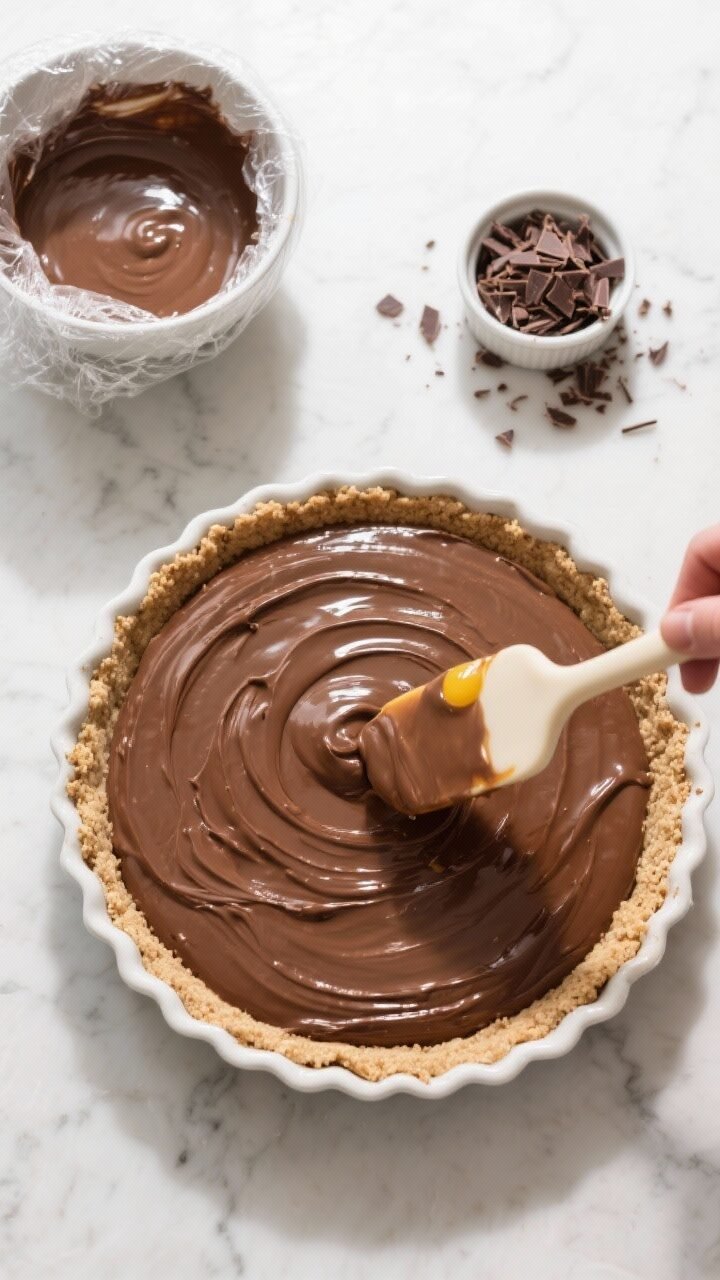
- Add chocolate and flavorings. Remove from heat. Stir in the chopped chocolate, butter, and vanilla until smooth and glossy.
- Cool slightly. Transfer the filling to a bowl. Press a piece of plastic wrap directly onto the surface to prevent a skin.Let it cool to warm room temperature, about 20 minutes.
- Fill the crust. Pour the warm filling into the chilled crust and smooth the top. Cover the pie loosely and refrigerate until set, at least 4 hours or overnight for the cleanest slices.
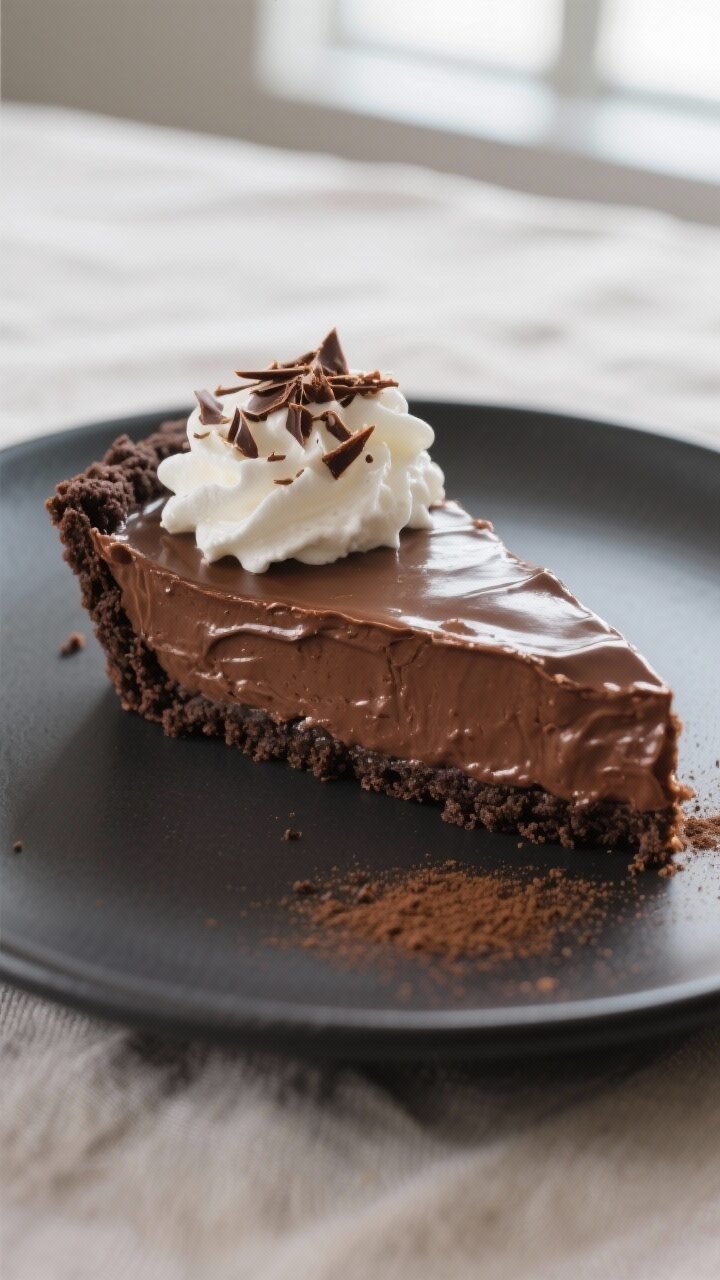
- Whip the topping. In a cold bowl, beat the heavy cream, powdered sugar, and vanilla to soft peaks. Spread or pipe over the chilled pie.
- Garnish and serve. Add chocolate shavings or a dusting of cocoa powder.Slice with a sharp knife, wiping the blade between cuts for neat slices.
Why This Recipe Works
This pie relies on a classic combination: a crisp cookie crust, a creamy chocolate custard-like filling, and a fluffy whipped topping. Using cornstarch and egg yolks gives the filling body and a silky texture without baking. High-quality chocolate adds depth, while a small amount of butter creates a glossy finish.
The no-bake approach keeps the process straightforward and makes this a reliable, make-ahead dessert.
Shopping List
- For the crust:
- 1 1/2 cups chocolate cookie crumbs (such as Oreo crumbs, without filling)
- 6 tablespoons unsalted butter, melted
- 2 tablespoons granulated sugar
- Pinch of salt
- For the chocolate filling:
- 2 cups whole milk (or 1 1/2 cups milk + 1/2 cup heavy cream for extra richness)
- 1/2 cup granulated sugar
- 3 tablespoons cornstarch
- 1/4 teaspoon fine salt
- 3 large egg yolks
- 6 ounces semisweet or bittersweet chocolate, finely chopped
- 2 tablespoons unsalted butter
- 1 teaspoon pure vanilla extract
- For the topping:
- 1 cup cold heavy whipping cream
- 2 tablespoons powdered sugar
- 1/2 teaspoon vanilla extract
- Optional: chocolate shavings or cocoa powder for garnish
Instructions
- Prepare the crust. In a bowl, mix the cookie crumbs, sugar, and salt. Pour in the melted butter and stir until the mixture resembles wet sand.
- Press and chill. Firmly press the crumb mixture into a 9-inch pie dish, covering the bottom and sides evenly. Use a flat-bottomed glass for a tight, compact crust.Chill in the fridge for at least 20 minutes.
- Start the filling base. In a medium saucepan, whisk together sugar, cornstarch, and salt. Add the milk (and cream, if using) gradually, whisking until smooth. Whisk in the egg yolks.
- Cook until thickened. Place the pan over medium heat and cook, whisking constantly, until the mixture thickens and starts to bubble, 5–7 minutes.Let it bubble for 30–60 seconds while whisking to cook off the starch taste.
- Add chocolate and flavorings. Remove from heat. Stir in the chopped chocolate, butter, and vanilla until smooth and glossy.
- Cool slightly. Transfer the filling to a bowl. Press a piece of plastic wrap directly onto the surface to prevent a skin.Let it cool to warm room temperature, about 20 minutes.
- Fill the crust. Pour the warm filling into the chilled crust and smooth the top. Cover the pie loosely and refrigerate until set, at least 4 hours or overnight for the cleanest slices.
- Whip the topping. In a cold bowl, beat the heavy cream, powdered sugar, and vanilla to soft peaks. Spread or pipe over the chilled pie.
- Garnish and serve. Add chocolate shavings or a dusting of cocoa powder.Slice with a sharp knife, wiping the blade between cuts for neat slices.
Storage Instructions
Keep the pie covered in the refrigerator for up to 3 days. Add the whipped cream just before serving for the best texture, or whip it slightly firmer if topping ahead. For make-ahead, the crust and filling can be prepared a day early; top with whipped cream right before serving.
Avoid freezing, as the custard can separate and the crust may turn soggy.
Benefits of This Recipe
- No oven required: Perfect for warm days or when you need the oven free.
- Make-ahead friendly: The pie sets in the fridge and slices cleanly the next day.
- Silky texture: Cornstarch and egg yolks create a smooth, stable filling.
- Customizable sweetness: Choose semisweet or bittersweet chocolate to taste.
- Foolproof crust: Cookie crumbs and butter deliver consistent results.
Common Mistakes to Avoid
- Skipping the chill time: The pie needs several hours to set. Cutting too soon results in messy slices.
- Overheating the filling: High heat can scramble the yolks. Keep it at medium heat and whisk constantly.
- Not thickening enough: Let the custard bubble for at least 30 seconds after it thickens to fully activate the cornstarch.
- Watery crust: If the crumb mixture looks dry and won’t hold together when pressed, add another tablespoon of melted butter.
- Using low-quality chocolate: The chocolate is the star.Pick a brand you enjoy eating on its own.
Alternatives
- Crust swaps: Try graham crackers, Biscoff cookies, or a pretzel crust for sweet-salty contrast.
- Dairy-free version: Use full-fat coconut milk for the filling and a plant-based butter for the crust. Top with coconut whipped cream.
- Gluten-free option: Use gluten-free chocolate cookies or almond flour crust (almond flour, cocoa powder, sugar, and butter).
- Flavor twists: Add 1 teaspoon espresso powder to the filling for mocha notes, or 1 tablespoon of bourbon or orange liqueur after cooking for a grown-up spin.
- Lighten it up: Swap some semisweet chocolate for milk chocolate and use all milk for a softer, sweeter pie.
FAQ
Can I use cocoa powder instead of chocolate?
Not for this recipe. Cocoa powder won’t provide the fat and emulsifiers that make the filling silky and stable.
Solid chocolate melts into the custard, creating a rich texture and deeper flavor.
How do I prevent lumps in the filling?
Whisk the dry ingredients first, add the milk slowly, and keep whisking as it heats. If you still see lumps, strain the hot filling through a fine mesh sieve before adding the chocolate.
Is it safe to use egg yolks without baking?
Yes. The mixture is cooked on the stove to a bubbling simmer, which heats it enough to safely thicken the yolks.
Keep the mixture at a gentle bubble for 30–60 seconds.
Can I make this ahead?
Absolutely. The pie is best after chilling for several hours or overnight. Whip and add the topping the day you plan to serve for the best texture.
What chocolate works best?
Use a bar of semisweet or bittersweet chocolate (55–70% cocoa).
Chop it finely so it melts quickly. Avoid chocolate chips if possible, as they contain stabilizers that resist melting.
How can I get clean slices?
Chill the pie thoroughly. Use a sharp knife dipped in hot water, wipe clean after each cut, and slice decisively rather than sawing.
My crust crumbles when slicing.
What went wrong?
It likely needed more butter or firmer packing. Next time, press the crumbs down more firmly and chill longer. You can also add a touch more butter to help it hold.
In Conclusion
This no-bake chocolate cream pie is a dependable, elegant dessert that’s simple enough for beginners and satisfying for chocolate lovers.
With a crisp crust, a smooth chocolate filling, and a cloud of whipped cream, it checks every box. Make it ahead, dress it up with shavings, and watch it disappear slice by slice. It’s a keeper for busy days, holidays, and everything in between.